Love this? Save it for later!
Share the inspiration with your friends
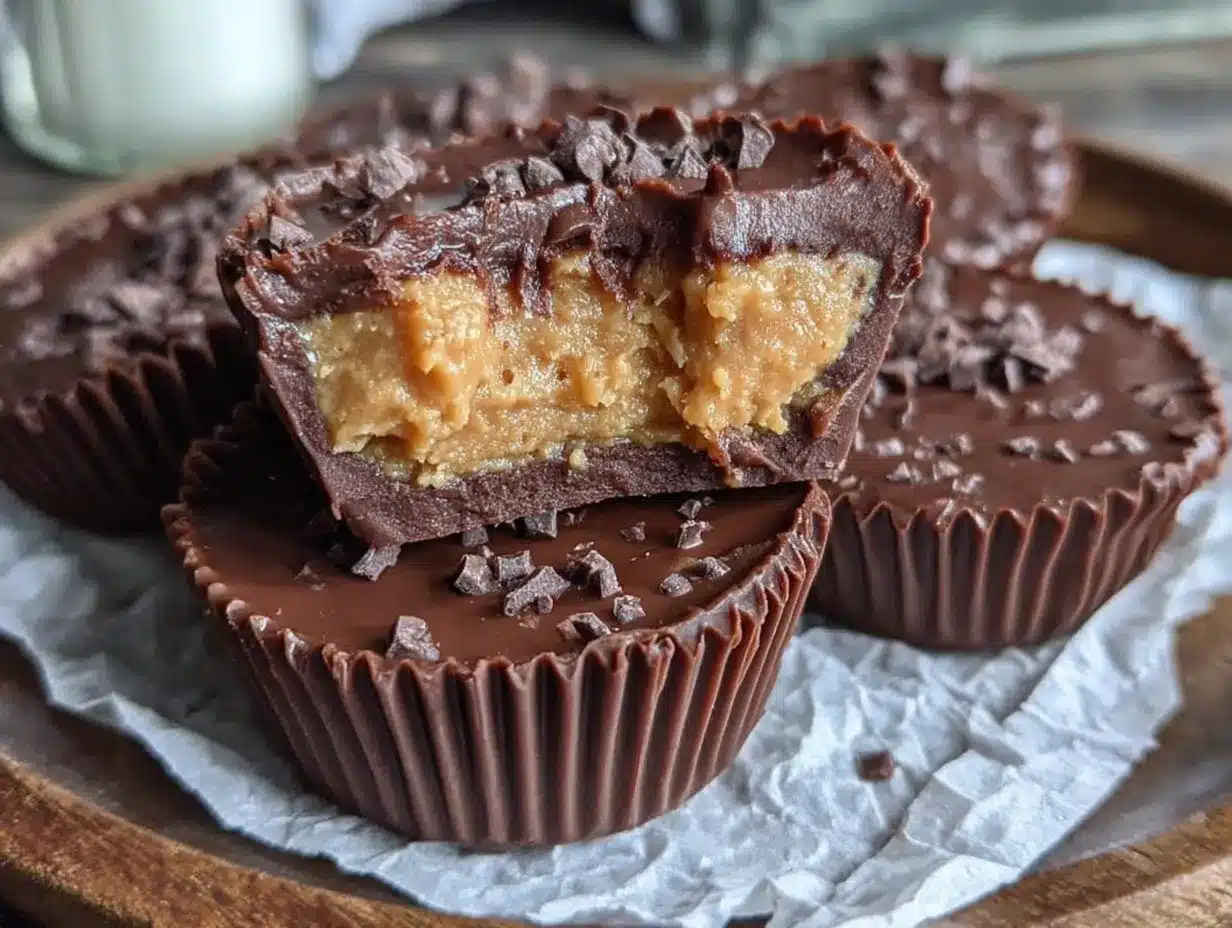
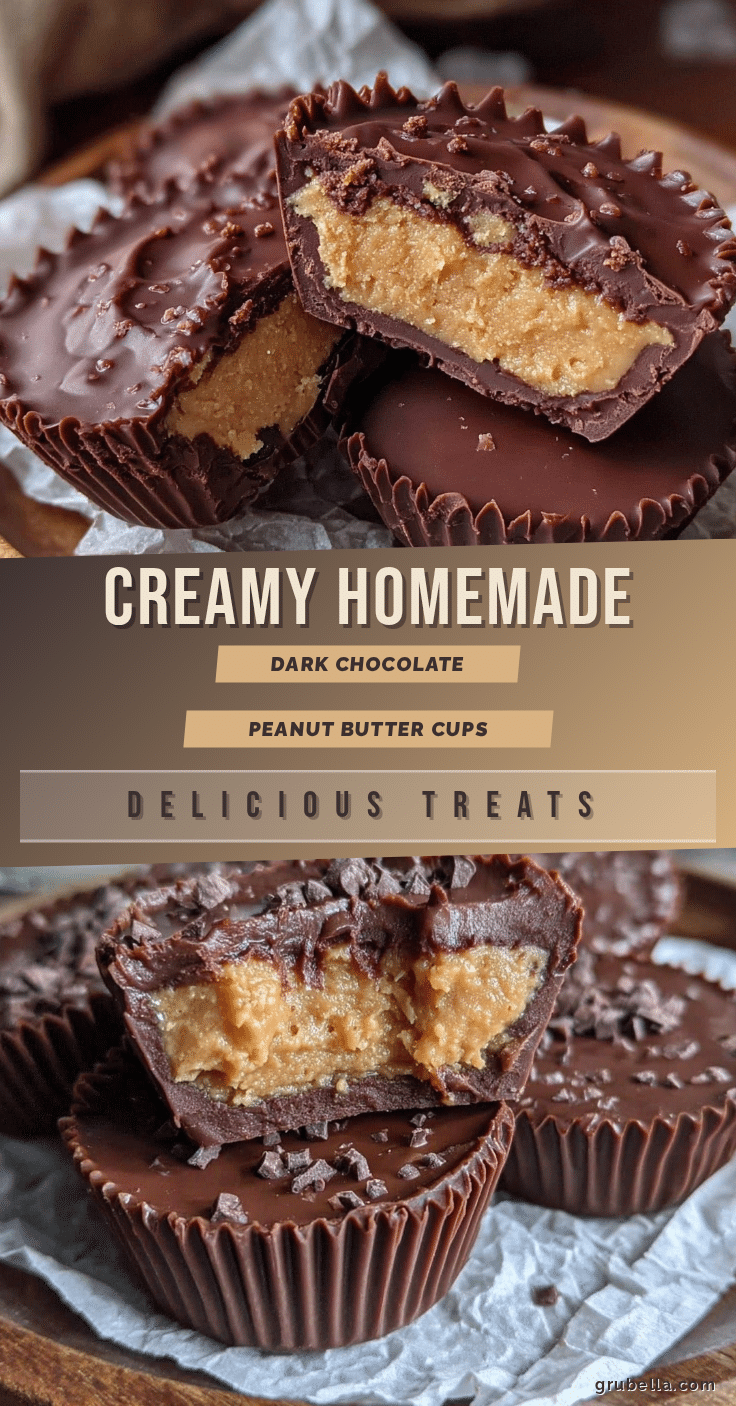
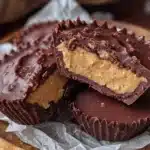
“I wasn’t expecting much when I grabbed a dusty little notebook off the bottom shelf at that tiny bookstore on Maple Street,” I confessed to a friend just last week. Honestly, it looked like a random jumble of scribbles and smudged notes, but there it was—a recipe titled Creamy Homemade Peanut Butter Cups with Dark Chocolate Shell. I had been craving something sweet yet rich, and this recipe promised just that. The magic? That perfect balance between the thick, luscious peanut butter filling and the crisp snap of dark chocolate on the outside.
That afternoon, I cleared the kitchen counter—well, tried to, but you know how it goes with a cluttered space—and set to work. I forgot to melt the chocolate slowly at first, causing a tiny mess, but the taste? Oh, it was worth every drop of spilled chocolate. Maybe you’ve been there, fumbling through a recipe but ending up with something unexpectedly delicious. This peanut butter cup recipe stayed with me because it’s simple enough to whip up on a whim, yet impressive enough to share.
Let me tell you, these aren’t your average peanut butter cups. The dark chocolate shell adds a deep, slightly bitter contrast that makes the creamy peanut butter center sing. Plus, making them from scratch means you control every ingredient—no mystery fillers or weird preservatives. This recipe has been my go-to comfort treat, especially on those nights when I just need a little chocolate hug.
Why You’ll Love This Recipe
Having made these creamy homemade peanut butter cups countless times (some batches better than others, I admit), I can confidently say this recipe hits all the right notes. It’s been tested in my kitchen, tweaked for texture, and approved by friends with discerning sweet tooths.
- Quick & Easy: Comes together in under 30 minutes, perfect for last-minute dessert cravings or thoughtful homemade gifts.
- Simple Ingredients: Uses pantry staples you probably already have—no need for specialty stores or oddball items.
- Perfect for Gifting: These cups make a charming addition to holiday baskets, birthday treats, or just because.
- Crowd-Pleaser: Kids and adults alike love the creamy texture paired with the snap of the dark chocolate shell.
- Unbelievably Delicious: The deep flavor of quality dark chocolate balances the sweet, nutty filling in a way store-bought versions just can’t match.
What really sets this recipe apart is the technique for the dark chocolate shell—it’s thin enough to give you that satisfying snap but thick enough to hold the creamy center without any spillover. Plus, the filling is whipped just right to feel indulgent but not too heavy. I like to think of it as comfort food with a touch of elegance, the kind that makes you pause and savor each bite.
What Ingredients You Will Need
This recipe uses simple, wholesome ingredients to deliver that perfect balance of creamy peanut butter and rich dark chocolate without fussing over complicated steps or exotic items.
- For the Peanut Butter Filling:
- 1 cup creamy peanut butter (I prefer Smucker’s Natural Creamy for its smooth texture and pure flavor)
- 1/4 cup unsalted butter, softened (adds richness and creaminess)
- 1/4 cup powdered sugar (for sweetness and structure)
- 1/2 teaspoon vanilla extract (enhances flavor depth)
- Pinch of salt (balances the sweetness)
- For the Dark Chocolate Shell:
- 1 1/2 cups dark chocolate chips or chopped dark chocolate (70% cacao recommended for that slightly bitter edge)
- 1 teaspoon coconut oil (optional, helps with smooth melting and glossy finish)
Note: If you want a dairy-free option, swap the butter with coconut oil and use dairy-free dark chocolate. Also, for a gluten-free treat, ensure your powdered sugar is certified gluten-free.
Equipment Needed
- Mini muffin tin or silicone candy molds (for shaping your peanut butter cups)
- Mixing bowls (one for filling, one for chocolate)
- Electric mixer or sturdy whisk (helps whip the peanut butter filling smooth)
- Microwave-safe bowl or double boiler (for melting chocolate gently)
- Spatula (for folding and spreading)
- Measuring cups and spoons
If you don’t have a mini muffin tin, silicone molds work wonderfully and make popping out the cups a breeze. I once tried a regular muffin tin lined with cupcake papers, but the shape was less defined, so I stick with mini tins now. For melting chocolate, a double boiler is ideal to avoid burning, but a microwave in short bursts works fine too—just stir often!
Preparation Method
- Prepare the Peanut Butter Filling (10 minutes): In a mixing bowl, combine 1 cup creamy peanut butter, 1/4 cup softened unsalted butter, 1/4 cup powdered sugar, 1/2 teaspoon vanilla extract, and a pinch of salt. Use an electric mixer or whisk to blend until smooth and creamy. The texture should be thick but spreadable. If it’s too stiff, a tiny splash of milk can help loosen it.
- Melt the Dark Chocolate (5-7 minutes): Place 1 1/2 cups dark chocolate chips and 1 teaspoon coconut oil in a microwave-safe bowl. Microwave in 30-second intervals, stirring well each time until fully melted and smooth. Alternatively, melt the chocolate over a double boiler on low heat, stirring gently to prevent overheating.
- Form the Chocolate Base (5 minutes): Spoon about 1 teaspoon of melted chocolate into each cup of your mini muffin tin or mold. Use the back of the spoon to spread it evenly, covering the bottom and a little up the sides. Tap the tin gently on the counter to level the chocolate. Place the tin in the freezer for 5 minutes to set the base shell.
- Add the Peanut Butter Filling (5 minutes): Take the peanut butter mixture and roll it into small balls (~1 tablespoon each). Press each ball gently into the set chocolate shells, flattening slightly to fill the cups without spilling over.
- Seal with Chocolate (5 minutes): Spoon more melted dark chocolate over each peanut butter filling, covering it completely. Tap the tin gently again to smooth the tops and remove air bubbles.
- Chill to Set (20-30 minutes): Place the tin in the refrigerator until the chocolate is fully firm and the cups hold their shape. This chilling step is key for that satisfying snap when you bite in.
- Serve or Store: Once set, gently pop the peanut butter cups out of their molds. Store in an airtight container in the fridge for up to a week.
Pro tip: If your chocolate seizes or thickens while melting, add a tiny splash of coconut oil or vegetable oil and stir until smooth again. Also, don’t skip chilling the base before adding the filling—it keeps everything neat and prevents mixing.
Cooking Tips & Techniques
Making homemade peanut butter cups is honestly not rocket science, but a few tricks can make your batch shine.
- Use Quality Chocolate: Dark chocolate with at least 70% cacao adds that perfect bittersweet flavor. Cheaper chocolates can be too sweet or waxy.
- Control the Temperature: Overheating chocolate can cause it to seize. Melt it slowly and stir often. If it does seize, a little coconut oil helps smooth it out.
- Whip the Filling Just Right: Too thin, and it won’t hold its shape; too thick, and it can feel dry. Adding a bit of softened butter and powdered sugar balances creaminess and structure.
- Chilling Matters: Freezing the chocolate base before adding filling prevents mixing and ensures clean layers. Don’t rush this step.
- Multitasking: While chocolate is chilling, prep the filling to save time. I usually prep the filling while the chocolate sets in the freezer.
- Handling Peanut Allergies: If you’re making these for someone with allergies, swap peanut butter for almond or sunflower seed butter with similar creaminess.
One time, I skipped chilling the base and ended up with a melted mess instead of neat cups. Lesson learned: patience pays off in homemade treats!
Variations & Adaptations
One of the best parts about this recipe is how easy it is to switch things up based on your preferences or dietary needs.
- Nut-Free Version: Use sunflower seed butter or soy nut butter instead of peanut butter for a safe alternative.
- White Chocolate Shell: Swap dark chocolate for white chocolate chips, but add a pinch of salt to the filling to balance the sweetness.
- Crunchy Peanut Butter Cups: Stir in 1/4 cup crushed roasted peanuts or chopped pretzels into the peanut butter filling for added texture.
- Spiced Variation: Add a pinch of cinnamon or cayenne pepper to the filling for a subtle kick and warmth.
- Keto-Friendly Adaptation: Use powdered erythritol instead of sugar and choose sugar-free dark chocolate to keep it low-carb.
I once tried adding a swirl of honey into the peanut butter mixture, and it gave a lovely floral note that was surprisingly addictive. Feel free to experiment—you might just find your own signature twist!
Serving & Storage Suggestions
These peanut butter cups are best served chilled or at cool room temperature, so the chocolate shell holds its snap but the filling remains creamy. I like to serve them on a decorative platter, maybe with a few roasted peanuts scattered around for a little extra flair.
Pair them with a cup of freshly brewed coffee or a creamy latte for a perfect afternoon treat. For gatherings, they make a charming homemade dessert that looks fancy but is super easy to prepare.
Store leftover cups in an airtight container in the refrigerator for up to one week. You can also freeze them for up to a month—just thaw in the fridge before serving to keep that silky texture intact.
Reheating is generally not recommended since melting the chocolate shell ruins the texture, but if you like them a bit softer, leave them out at room temperature for 10-15 minutes before indulging.
Flavors deepen as they chill, so sometimes I make them a day ahead and let the peanut butter and chocolate marry overnight. Trust me, the wait is worth it.
Nutritional Information & Benefits
An average creamy homemade peanut butter cup (about 30g) contains approximately:
| Nutrient | Amount |
|---|---|
| Calories | 190 |
| Fat | 15g (mostly healthy fats from peanuts and dark chocolate) |
| Protein | 5g |
| Carbohydrates | 10g (includes sugars from chocolate and powdered sugar) |
Peanuts provide protein and heart-healthy monounsaturated fats, while dark chocolate is rich in antioxidants. This treat fits well into a balanced diet when enjoyed in moderation, especially if you choose high-quality, minimally processed ingredients.
For those watching sugar intake, substituting powdered sugar with a natural sweetener like stevia or erythritol can help, while keeping the indulgent texture intact.
Conclusion
Making creamy homemade peanut butter cups with a dark chocolate shell has become one of my favorite kitchen rituals. It’s a sweet treat that feels indulgent but is surprisingly straightforward to make. Whether you’re craving a quick dessert or looking for a thoughtful gift, these peanut butter cups deliver on flavor and texture every time.
Feel free to tweak the recipe to suit your tastes—maybe you like them a little sweeter, or with a hint of salt, or even crunchy. This recipe is flexible, friendly, and forgiving, just like good comfort food should be.
If you try it out, I’d love to hear how your batch turns out or what fun variations you come up with. Drop a comment below or share your peanut butter cup stories—I’m always excited to swap kitchen wins and mishaps!
Remember, sometimes the simplest homemade treats bring the biggest smiles.
FAQs
Can I use crunchy peanut butter instead of creamy?
Yes, but the texture will be chunkier and less smooth. If you prefer a silky filling, creamy peanut butter works best.
What if I don’t have a mini muffin tin?
Silicone candy molds or even small paper cupcake liners in a regular muffin tin work well too. Just adjust the amount of filling to fit your mold size.
How do I prevent the chocolate from melting too quickly when eating?
Serve the peanut butter cups chilled or at cool room temperature. Avoid holding them in your hand for too long before eating to keep the shell intact.
Can I make these vegan?
Absolutely! Use dairy-free butter alternatives and vegan dark chocolate. Make sure your powdered sugar doesn’t contain bone char.
How long will these peanut butter cups stay fresh?
Store them in an airtight container in the fridge for up to one week or freeze for up to a month. Thaw in the fridge before eating for best texture.
For those who love homemade chocolate treats, you might enjoy trying this homemade chocolate truffles recipe that features a similarly rich dark chocolate base. Or if you’re in the mood for a peanut butter twist, the peanut butter banana smoothie is a refreshing way to enjoy that creamy nutty flavor in a different form.
Pin This Recipe!
Creamy Homemade Peanut Butter Cups with Dark Chocolate Shell
A simple and delicious recipe for creamy peanut butter cups with a rich dark chocolate shell that offers a perfect balance of sweet and slightly bitter flavors.
- Prep Time: 10 minutes
- Cook Time: 20-30 minutes
- Total Time: 30-40 minutes
- Yield: 24 mini peanut butter cups 1x
- Category: Dessert
- Cuisine: American
Ingredients
- 1 cup creamy peanut butter (preferably Smucker’s Natural Creamy)
- 1/4 cup unsalted butter, softened
- 1/4 cup powdered sugar
- 1/2 teaspoon vanilla extract
- Pinch of salt
- 1 1/2 cups dark chocolate chips or chopped dark chocolate (70% cacao recommended)
- 1 teaspoon coconut oil (optional)
Instructions
- Prepare the Peanut Butter Filling (10 minutes): In a mixing bowl, combine 1 cup creamy peanut butter, 1/4 cup softened unsalted butter, 1/4 cup powdered sugar, 1/2 teaspoon vanilla extract, and a pinch of salt. Use an electric mixer or whisk to blend until smooth and creamy. If too stiff, add a tiny splash of milk to loosen.
- Melt the Dark Chocolate (5-7 minutes): Place 1 1/2 cups dark chocolate chips and 1 teaspoon coconut oil in a microwave-safe bowl. Microwave in 30-second intervals, stirring well each time until fully melted and smooth. Alternatively, melt over a double boiler on low heat, stirring gently.
- Form the Chocolate Base (5 minutes): Spoon about 1 teaspoon of melted chocolate into each cup of a mini muffin tin or silicone mold. Spread evenly covering bottom and sides. Tap tin gently to level chocolate. Freeze for 5 minutes to set.
- Add the Peanut Butter Filling (5 minutes): Roll peanut butter mixture into small balls (~1 tablespoon each). Press each ball gently into the set chocolate shells, flattening slightly without spilling over.
- Seal with Chocolate (5 minutes): Spoon more melted dark chocolate over each peanut butter filling, covering completely. Tap tin gently to smooth tops and remove air bubbles.
- Chill to Set (20-30 minutes): Refrigerate until chocolate is fully firm and cups hold shape.
- Serve or Store: Pop peanut butter cups out of molds gently. Store in an airtight container in the fridge for up to one week.
Notes
Use quality dark chocolate with at least 70% cacao for best flavor. Melt chocolate slowly to avoid seizing; add coconut oil if needed. Chill the chocolate base before adding filling to prevent mixing. For dairy-free option, substitute butter with coconut oil and use dairy-free chocolate. Store in airtight container in fridge up to one week or freeze up to one month. Let thaw in fridge before serving.
Nutrition
- Serving Size: 1 mini peanut butter
- Calories: 190
- Fat: 15
- Carbohydrates: 10
- Protein: 5
Keywords: peanut butter cups, homemade peanut butter cups, dark chocolate, easy dessert, no bake dessert, creamy peanut butter filling, chocolate shell