Love this? Save it for later!
Share the inspiration with your friends
“I wasn’t expecting to become the dessert curator of the year,” my friend Jenna laughed as she handed me a colorful plate. It was the Saturday before her niece’s graduation party, and she’d just discovered the magic of a dessert charcuterie board in school colors. Honestly, I was skeptical at first—how could a board of sweets really capture that celebratory spirit without looking like a sugar overload? But there we were, surrounded by bowls of red, white, and blue treats, and I had to admit—it was a feast for the eyes and the taste buds.
The idea came from a last-minute panic when the bakery couldn’t deliver the custom cake Jenna had ordered. With only hours left, she grabbed a variety of candies, cookies, and fresh fruits, all matching the school colors, and artistically arranged them on a large wooden board. That cracked bowl of mixed berries almost tipped over, and I was the one who accidentally dropped a handful of mini marshmallows on the floor (typical me), but somehow the imperfect chaos added charm to the final look.
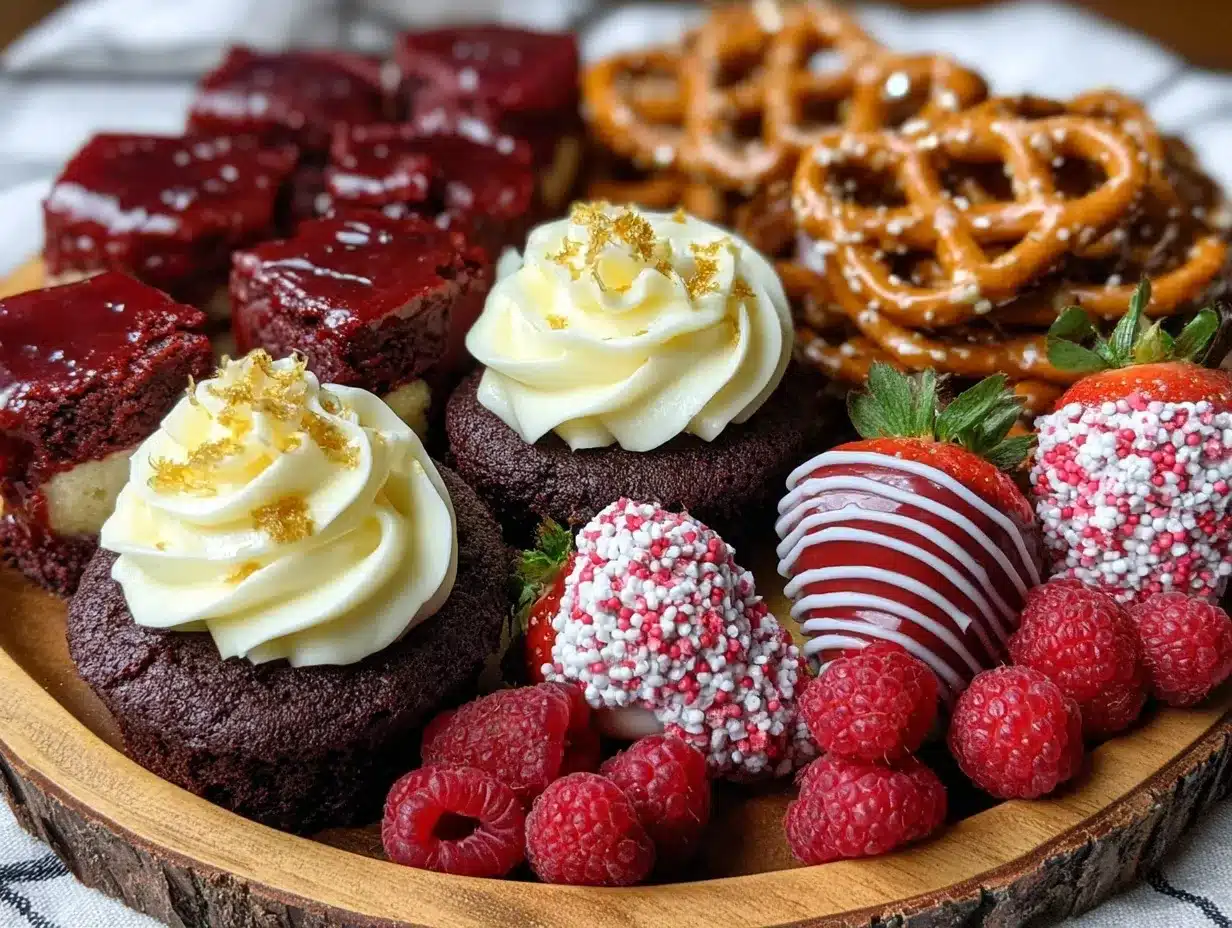
Maybe you’ve been there—trying to create something festive, simple, and delicious without spending days in the kitchen. This Perfect Graduation Party Dessert Charcuterie Board in School Colors isn’t just about sweets; it’s about bringing people together, celebrating milestones, and making memories that stick. Let me tell you, this board has become my go-to for all kinds of celebrations, and I’m excited to share how you can craft one that’s just as stunning and scrumptious.
Why You’ll Love This Recipe
After testing and tweaking this dessert charcuterie board idea more times than I can count, I can say it’s truly a winner. Whether you’re throwing a casual backyard bash or a fancy graduation party, this board brings style and simplicity together in a way that’s hard to beat. Here’s why it stands out:
- Quick & Easy: Comes together in under 45 minutes, perfect for busy hosts juggling last-minute details.
- Simple Ingredients: No need for fancy or hard-to-find items; most components are pantry staples or easy-to-source local treats.
- Perfect for Graduation Celebrations: Tailored to match school colors, making it a festive centerpiece that shows off your pride.
- Crowd-Pleaser: Everyone from kids to grandparents loves sampling from a colorful, shareable spread.
- Unbelievably Delicious: The mix of textures and flavors—from crunchy cookies to juicy berries—keeps everyone coming back for more.
This isn’t just another dessert platter. The magic happens in how you balance the colors and textures, creating a vibrant, eye-catching board that’s as much fun to look at as it is to eat. Plus, adding a few homemade touches, like a drizzle of chocolate or a sprinkle of edible glitter, really takes it up a notch. Honestly, it’s the kind of dessert that makes guests pause, smile, and say, “Wow, you really thought of everything.”
What Ingredients You Will Need
This dessert charcuterie board uses simple, wholesome ingredients to deliver bold color and satisfying texture without the fuss. You can easily customize it based on your graduate’s school colors and personal favorites. Here’s a breakdown:
- For the Base:
- Assorted cookies (sugar cookies, shortbread, or homemade butter cookies)
- Mini cupcakes or cake bites in coordinating colors (store-bought or homemade)
- For the Fresh Elements:
- Strawberries, raspberries, or cherries (for red)
- Blueberries or blackberries (for blue or purple shades)
- Green grapes or kiwi slices (if green is part of the school colors)
- For the Candy & Sweet Treats:
- Colored jelly beans or candy-coated chocolates (M&Ms work great)
- Mini marshmallows or white chocolate chips (adds contrast)
- Gumdrops or licorice ropes (choose colors accordingly)
- For Decoration & Accents:
- Edible glitter or colored sugar sprinkles (optional, for sparkle)
- Chocolate drizzle (dark, milk, or white chocolate)
- Fresh mint leaves (for a pop of green and freshness)
I prefer using Trader Joe’s for fresh berries because their quality tends to be consistent, but local farmers markets are fantastic too when in season. For cookies, homemade always tastes better, but store-bought sugar cookies from Whole Foods or a trusted bakery save time and still look great. If you’re aiming for a gluten-free option, almond flour cookies or gluten-free candy selections can easily substitute the regular treats without losing the festive vibe.
Equipment Needed
Putting together this Perfect Graduation Party Dessert Charcuterie Board doesn’t demand fancy gear, but having the right tools makes life easier:
- Large wooden or slate serving board (around 18×24 inches works well)
- Small bowls or ramekins (for holding loose candies or dips)
- Sharp knife and cutting board (for slicing fruits and cake bites)
- Offset spatula or butter knife (useful for smoothing spreads or arranging delicate treats)
- Tweezers or small tongs (great for placing tiny candies precisely)
- Piping bag or plastic zip-top bag (for drizzling chocolate)
If you don’t have a large serving board, a couple of smaller trays arranged together can work just as well. I once used a clean baking sheet lined with parchment paper in a pinch, and no one noticed! For chocolate drizzling, a microwave-safe bowl and a fork do the trick if you don’t own a piping bag. Keep your knives sharp to avoid squishing soft fruits, and if you’re using fresh mint or edible flowers, a gentle rinse and pat dry beforehand is a must to keep everything looking fresh and inviting.
Preparation Method
- Prepare All Ingredients Ahead (15-20 minutes): Wash and dry fresh fruits thoroughly. Slice strawberries, kiwi, or grapes into bite-sized pieces. Arrange cookies and cupcakes on a separate plate for easy access.
- Set Up Your Board (5 minutes): Place the large serving board on a flat surface. Position small bowls or ramekins spaced out across the board to hold loose candies or marshmallows. This gives the board structure and prevents candies from rolling off.
- Arrange the Base Layer (10 minutes): Start by placing larger items like cupcakes and cookie clusters on the board. Keep the colors balanced to represent the school colors evenly. For example, alternate red and blue cupcakes if those are the colors.
- Fill in With Fresh Fruits (10 minutes): Nestle sliced fruits around the base items, creating colorful pockets. Mix textures by pairing juicy berries with firmer grapes or kiwi. Avoid overcrowding; you want each color to pop.
- Add Candy & Sweet Treats (10 minutes): Sprinkle candies and mini marshmallows in the gaps. Use tweezers or tongs to place tiny candies precisely, especially if matching school colors. This step adds playful pops of color and fun.
- Drizzle Chocolate & Final Touches (5 minutes): Melt chocolate gently and drizzle over parts of the board for a gourmet touch. Scatter edible glitter or colored sugar sprinkles lightly for sparkle. Garnish with fresh mint leaves as a refreshing contrast.
- Serve Immediately or Chill Briefly: If preparing ahead, cover loosely with plastic wrap and refrigerate for up to 2 hours. Bring to room temperature before serving to amplify flavors.
Pro tip: If you notice any fruits sweating or looking soggy, pat them dry with a paper towel before adding to the board. Also, resist the urge to overcrowd the board—you want guests to enjoy picking and choosing without feeling overwhelmed. I learned the hard way when a board collapsed under too many heavy cupcakes once!
Cooking Tips & Techniques
Crafting a dessert charcuterie board that wows takes a bit of know-how. Here are some tips I picked up over years of entertaining:
- Balance Colors Thoughtfully: Distribute the school colors evenly across the board. Clumping all reds in one corner looks unbalanced, so mix them around for a cohesive appearance.
- Mix Textures: Pair chewy candies with crunchy cookies and juicy fruits. This keeps the palate interested and prevents the dessert from feeling one-note.
- Don’t Overdo the Chocolate Drizzle: A light drizzle adds elegance, but too much can cause sticky messes or mask other flavors. Melt chocolate slowly over low heat to avoid burning.
- Keep Fresh Fruits Dry: Moisture can make cookies soggy. Dry fruits well and add them last if prepping ahead to preserve texture.
- Use Small Bowls for Loose Items: This prevents candies from rolling off and makes it easier for guests to grab what they want.
- Mind the Temperature: Serve the board at room temperature for best flavor, but keep it chilled if the party is outdoors in warm weather.
One time, I forgot to dry the berries, and the cookies ended up soggy within minutes—it was a disaster but also a great lesson! Now, I always prep fruits meticulously. Also, multitasking is key when assembling: while the chocolate melts, slice fruits and arrange cookies to save time.
Variations & Adaptations
This dessert charcuterie board is incredibly flexible. Here are some ideas to fit different preferences or dietary needs:
- Vegan Version: Use dairy-free cupcakes, fruit, and vegan candies. Swap chocolate for dairy-free dark chocolate.
- Seasonal Adaptation: Swap berries for stone fruits like peaches or plums in summer, or use spiced apple slices in fall.
- Healthier Twist: Incorporate nuts, dried fruits, and dark chocolate-covered almonds for a less sugary option.
- Gluten-Free: Use gluten-free cookies and confirm candies are gluten-free certified.
- Personal Flavor Themes: Add a salted caramel dip or a tangy yogurt drizzle based on your taste preferences.
I once made a Halloween-themed board with orange and black candies and pumpkin-shaped cookies. It was a hit! Feel free to customize colors and flavors to suit your graduate’s personality or your party theme.
Serving & Storage Suggestions
For the best experience, serve your dessert charcuterie board within two hours of assembly. Room temperature really lets the flavors shine, especially the chocolates and fruits. Pair with sparkling water, iced tea, or a chilled dessert wine for grown-up gatherings.
Leftovers? Cover the board loosely with plastic wrap and refrigerate for up to 24 hours. Separate any moist fruits before storing to keep cookies crisp. When reheating cupcakes or cake bites, a quick 10-15 second zap in the microwave revives softness without drying them out.
The flavors actually meld beautifully if you prepare it a few hours ahead and let it sit chilled—just be sure to keep an eye on fruit moisture. Presentation is key, so refresh mint leaves and sprinkle on a few extra candies before serving again.
Nutritional Information & Benefits
This dessert charcuterie board balances indulgence with fresh fruit to offer a treat that’s not just sugary but also colorful and nutrient-rich. Here’s a rough estimate per serving:
| Nutrient | Estimate per Serving |
|---|---|
| Calories | 250-350 kcal |
| Sugar | 25-35 grams |
| Fiber | 3-5 grams |
| Protein | 3-5 grams |
Fresh fruits contribute antioxidants, vitamins, and fiber, while the cookies and candies satisfy sweet cravings. For those mindful of allergens, this recipe can be adapted to be gluten-free or dairy-free. I always keep an eye on the ingredient labels to accommodate guests with sensitivities.
Conclusion
This Perfect Graduation Party Dessert Charcuterie Board in School Colors is a celebration staple that combines ease, beauty, and flavor. It’s a way to honor your graduate’s achievement with a personalized touch that everyone can enjoy. Feel free to tweak the ingredients and colors to match your style or your school’s palette—it’s your party after all!
I keep coming back to this recipe because it brings people together in a relaxed, joyful way. Plus, the smiles when guests see that colorful board? Totally worth the little extra prep. If you try it, I’d love to hear how you made it your own—drop a comment or share your photos!
Here’s to sweet celebrations and unforgettable moments!
FAQs
What is a dessert charcuterie board?
It’s a beautifully arranged platter of assorted sweets like cookies, candies, fruits, and sometimes chocolates, designed for sharing and visual appeal.
Can I make the dessert board ahead of time?
Yes! Assemble it a few hours before your event and keep it covered in the fridge, but add fresh fruits and delicate decorations just before serving for best results.
How do I choose candies and sweets to match school colors?
Look for candies like M&Ms, jelly beans, or gummies in your school’s colors. Many stores offer seasonal or color-themed candy packs that make this easier.
What if I have guests with allergies?
Consider substituting gluten-free cookies, using dairy-free chocolates, and clearly labeling any nut-containing items to keep everyone safe and happy.
How do I keep cookies from getting soggy on the board?
Pat fresh fruits dry before placing them near cookies and avoid placing juicy items directly on baked goods. Using small bowls for moist items helps too.
Pin This Recipe!
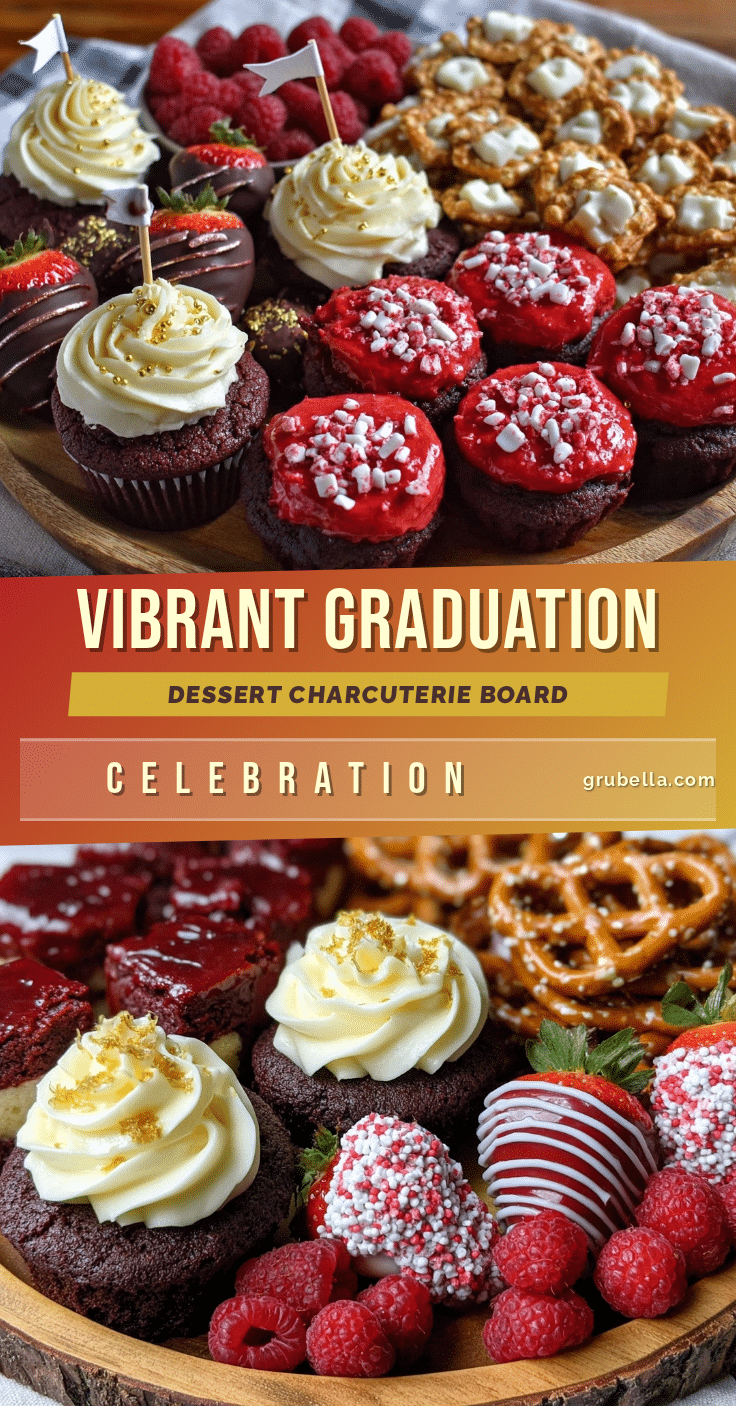
Perfect Graduation Party Dessert Charcuterie Board Ideas in School Colors for Easy Celebration

A colorful and festive dessert charcuterie board featuring cookies, cupcakes, fresh fruits, and candies arranged in school colors, perfect for graduation celebrations and easy to assemble in under 45 minutes.
- Prep Time: 20 minutes
- Cook Time: 0 minutes
- Total Time: 45 minutes
- Yield: 8 servings
- Category: Dessert
- Cuisine: American
Ingredients
- Assorted cookies (sugar cookies, shortbread, or homemade butter cookies)
- Mini cupcakes or cake bites in coordinating colors (store-bought or homemade)
- Strawberries, raspberries, or cherries (for red)
- Blueberries or blackberries (for blue or purple shades)
- Green grapes or kiwi slices (if green is part of the school colors)
- Colored jelly beans or candy-coated chocolates (M&Ms work great)
- Mini marshmallows or white chocolate chips
- Gumdrops or licorice ropes (choose colors accordingly)
- Edible glitter or colored sugar sprinkles (optional)
- Chocolate drizzle (dark, milk, or white chocolate)
- Fresh mint leaves
Instructions
- Prepare all ingredients ahead (15-20 minutes): Wash and dry fresh fruits thoroughly. Slice strawberries, kiwi, or grapes into bite-sized pieces. Arrange cookies and cupcakes on a separate plate for easy access.
- Set up your board (5 minutes): Place the large serving board on a flat surface. Position small bowls or ramekins spaced out across the board to hold loose candies or marshmallows.
- Arrange the base layer (10 minutes): Start by placing larger items like cupcakes and cookie clusters on the board. Keep the colors balanced to represent the school colors evenly.
- Fill in with fresh fruits (10 minutes): Nestle sliced fruits around the base items, creating colorful pockets. Mix textures by pairing juicy berries with firmer grapes or kiwi. Avoid overcrowding.
- Add candy and sweet treats (10 minutes): Sprinkle candies and mini marshmallows in the gaps. Use tweezers or tongs to place tiny candies precisely, especially if matching school colors.
- Drizzle chocolate and final touches (5 minutes): Melt chocolate gently and drizzle over parts of the board. Scatter edible glitter or colored sugar sprinkles lightly. Garnish with fresh mint leaves.
- Serve immediately or chill briefly: Cover loosely with plastic wrap and refrigerate for up to 2 hours if preparing ahead. Bring to room temperature before serving.
Notes
Pat fresh fruits dry before adding to the board to prevent soggy cookies. Use small bowls for loose candies to prevent rolling. Melt chocolate slowly over low heat to avoid burning. Serve at room temperature for best flavor. Can be prepared ahead and refrigerated for up to 2 hours; bring to room temperature before serving. Customize colors and ingredients to match school colors and dietary needs.
Nutrition
- Serving Size: Approximately 1/8th
- Calories: 300
- Sugar: 30
- Sodium: 150
- Fat: 12
- Saturated Fat: 5
- Carbohydrates: 40
- Fiber: 4
- Protein: 4
Keywords: dessert charcuterie board, graduation party dessert, school colors dessert, easy dessert, party dessert, colorful dessert board, sweets platter