Love this? Save it for later!
Share the inspiration with your friends
“These are too good for the grocery store.” My niece said this while standing on a stool in my kitchen, crumbs dusting her chin like powdered snow. She wasn’t being dramatic. She was just stating facts. We had just pulled a tray of these chewy bakery-style chocolate chip cookies from the oven, and the smell of browned butter had already taken over the house. It was that heavy, nutty aroma that makes you forget about dinner plans and just want to eat the whole batch.
I’ve made chocolate chip cookies for thirty years. I’ve tried every hack, every flour swap, and every brand of chocolate chip on the market. You know how it goes—some are crispy, some are cakey, and some just taste like sugar water. But this? This is the one that sticks. It’s the recipe I make when I need a win. It’s the one I bring to potlucks when I want people to ask for my number. Honestly, it’s the kind of cookie that makes you close your eyes after the first bite and just breathe.
The secret isn’t fancy ingredients. It’s actually quite simple. It’s about patience and a little bit of science. We’re talking about browning the butter first. It sounds intimidating if you’ve never done it, but it’s just melting butter until it smells like hazelnuts. Once you do that, you’re halfway there. The other part is chilling the dough. A lot of people skip this step because they’re impatient. But let me tell you, chilling the dough is what gives these cookies their dense, fudgy center. If you bake them right away, they’ll spread too thin and lose that bakery-style texture we’re chasing.
I remember the first time I made these for a neighborhood bake sale. I was nervous. I didn’t want to embarrass myself with a tray of flat, greasy discs. But when the lady at the table took a bite, she actually stopped talking mid-sentence. That silence was louder than any compliment. Since then, this recipe has been my go-to. It’s reliable. It’s forgiving. And it tastes like comfort. If you’re looking for a dessert that feels homemade but tastes professional, this is it. Let’s get baking.
Why You’ll Love This Recipe
There is a reason this specific version of chocolate chip cookies has become my most requested recipe. It’s not just about the taste, though the flavor is undeniable. It’s about the texture. Most homemade cookies fall into two categories: crispy like a cracker or soft like a cloud. This recipe lives in that perfect middle ground. It’s chewy. It’s dense. It has that satisfying resistance when you bite into it, followed by the melt-in-your-mouth chocolate chips.
- Quick & Easy: Despite the chilling time, the active prep work is under 20 minutes. You can have these ready for the oven before you’ve even finished your morning coffee. It’s perfect for busy weeknights when you need a treat but don’t have hours to spare.
- Simple Ingredients: You likely have everything in your pantry right now. Flour, sugar, butter, eggs, chocolate. No obscure flours or weird extracts. Just good, honest baking staples. This makes it accessible for anyone, regardless of their cooking skill level.
- Perfect for Gifting: These cookies travel well. They stay fresh for days in an airtight container. I love packing a dozen in a tin box to give to neighbors or coworkers. They look professional and taste homemade, which is the best of both worlds.
- Crowd-Pleaser: Kids love the sweetness. Adults love the complexity from the browned butter. It’s a rare recipe that satisfies both sweet tooths and those who appreciate a deeper flavor profile. It’s always a hit at parties.
- Unbelievably Delicious: The combination of browned butter and a mix of dark and milk chocolate chips creates a flavor profile that is next-level. It’s rich, salty, sweet, and nutty all at once. It’s comfort food reimagined—healthier in spirit, but with the same soul-soothing satisfaction.
What makes this recipe different from the rest is the technique. Many recipes call for creaming butter and sugar together until fluffy. That creates air pockets, which leads to a cakier cookie. We are skipping that step. Instead, we are mixing the melted butter directly with the sugars. This creates a denser, chewier crumb. It’s a small change in method, but it makes a huge difference in the final product. It’s not just another version—it’s your best version.
This recipe isn’t just good—it is the kind that makes you want to make it again and again. It’s the kind of cookie that brings people together. Whether you’re baking for a holiday party or just a Tuesday night craving, these cookies will deliver. They are stress-free to make and impressive to serve. You’ll wonder why you ever bought store-bought cookies again.
What Ingredients You Will Need
This recipe uses simple, wholesome ingredients to deliver bold flavor and satisfying texture without the fuss. The magic lies in the quality of the butter and the chocolate. Since there are so few ingredients, each one plays a critical role. You don’t need any fancy substitutions to make this work, but knowing what to look for will help you get that bakery-quality result.
For the Dough
- Unsalted Butter (1 cup / 226g): We need high-fat butter for the best flavor. I recommend brands like Kerrygold or Plugra. You’ll be browning this, so use a good quality butter. Salted butter can be used, but you’ll need to reduce the added salt in the recipe.
- Light Brown Sugar (1 ½ cups / 300g): This is the key to chewiness. Brown sugar contains molasses, which adds moisture and a hint of caramel flavor. Dark brown sugar works too, but light brown sugar gives a slightly milder taste.
- Granulated Sugar (½ cup / 100g): This helps with the slight crispness on the edges. It balances out the moisture from the brown sugar.
- Eggs (2 large): Room temperature eggs incorporate better into the dough. Don’t skip this; cold eggs can seize the melted butter.
- Vanilla Extract (2 tsp): Use pure vanilla extract, not imitation. The flavor needs to stand up to the rich butter.
- All-Purpose Flour (2 ½ cups / 315g): Spoon and level your flour. Don’t scoop it directly from the bag, or you’ll pack it in too tightly and get dry cookies.
- Baking Soda (1 tsp): This helps the cookies spread and brown. Make sure it’s fresh for best results.
- Salt (1 tsp): Salt is crucial for balancing the sweetness. Don’t omit it.
For the Mix-Ins
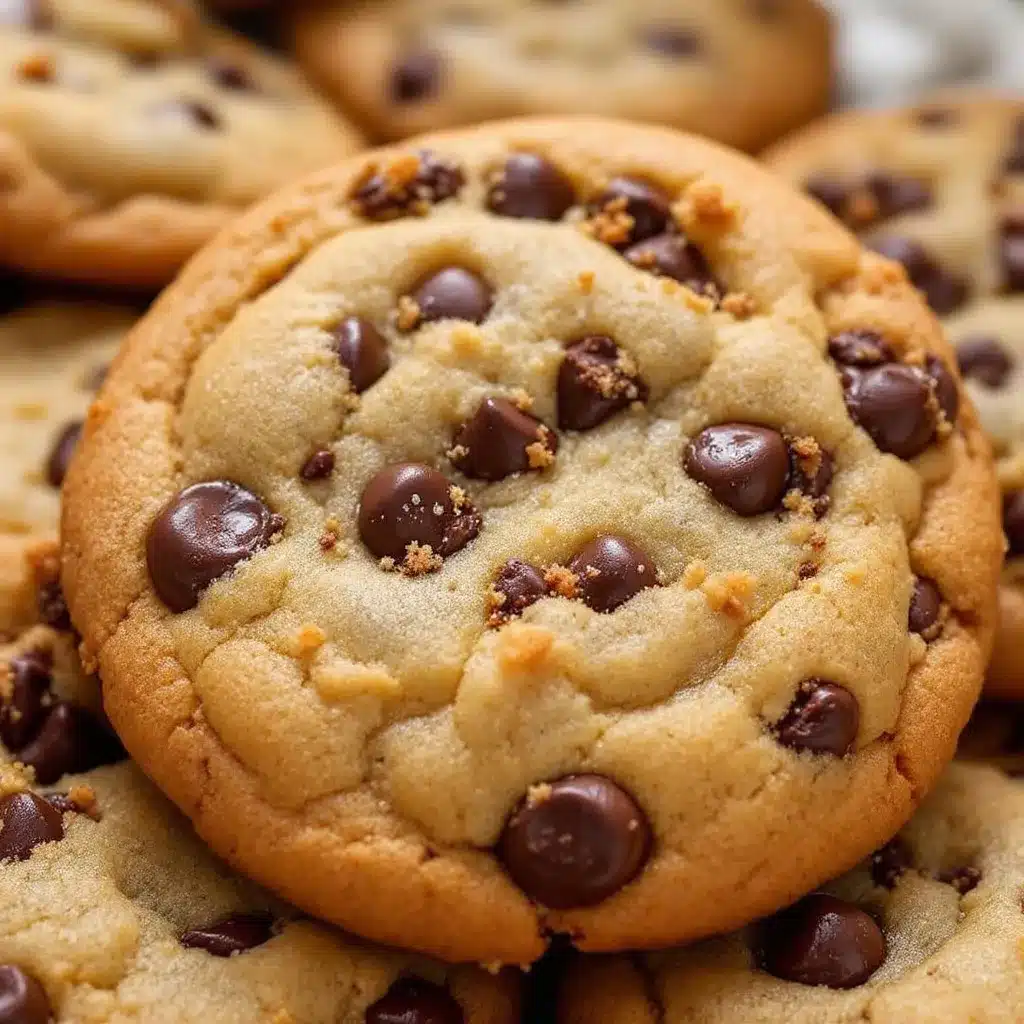
- Chocolate Chips (2 cups): I use a mix of semi-sweet and milk chocolate chips. Semi-sweet provides the chocolate flavor, while milk chocolate adds creaminess. Ghirardelli or Guittard are my go-to brands for baking.
- Flaky Sea Salt (for topping): This is optional but highly recommended. Sprinkling Maldon salt on top right after baking adds a beautiful crunch and enhances the chocolate flavor.
If you need to substitute, you can use gluten-free flour blend, but add a teaspoon of xanthan gum if it’s not included. For a dairy-free option, use a high-quality vegan butter stick, though the browning process might behave slightly differently. The chocolate chips should be dairy-free if needed, but most standard chips contain milk solids, so check labels.
Equipment Needed
You don’t need a lot of fancy gadgets to make these cookies. In fact, keeping it simple is part of the charm. Here is what you’ll need to get started.
- Large Heavy-Bottomed Saucepan: This is essential for browning the butter. A thin pan will burn the butter quickly. Stainless steel or enameled cast iron works best. You want even heat distribution.
- Mixing Bowls: You’ll need one large bowl for the wet ingredients and one medium bowl for the dry ingredients. A glass or ceramic bowl is nice because you can see the butter melting clearly.
- Whisk and Spatula: A silicone spatula is great for scraping the sides of the bowl and folding in the chocolate chips. A whisk is needed to aerate the sugars and butter.
- Baking Sheets: Use light-colored aluminum baking sheets. Dark sheets can cause the bottoms of the cookies to burn too quickly. If you only have dark sheets, reduce the oven temperature by 25 degrees.
- Parchment Paper: Always line your baking sheets. It prevents sticking and makes cleanup a breeze. It also helps the cookies bake evenly.
- Cooling Rack: Essential for stopping the cooking process. If you leave the cookies on the hot pan, they will continue to cook and become tough.
If you don’t have a heavy-bottomed saucepan, you can use a Dutch oven, but be careful not to overfill it. For mixing, a stand mixer with a paddle attachment works, but hand mixing is actually better for this recipe to avoid overworking the dough. Budget-friendly option: any standard stainless steel pot from your kitchen drawer will work fine.
Preparation Method
Making these cookies is straightforward, but timing is everything. Follow these steps closely for the best results. The total time from start to finish is about 45 minutes, plus the chilling time.
- Brown the Butter (5 minutes): Melt the butter in your heavy-bottomed saucepan over medium heat. Stir constantly. You will see it foam up. Then, the foam will subside, and you will see brown specks at the bottom. The smell will change from buttery to nutty. Remove from heat immediately and pour into a heatproof bowl. Let it cool for 10 minutes. (Warning: Do not burn the butter! It goes from perfect to bitter in seconds.)
- Mix Sugars and Butter (2 minutes): In your large mixing bowl, combine the cooled browned butter with the brown sugar and granulated sugar. Whisk vigorously for about 2 minutes. You want the mixture to look smooth and slightly glossy. This step incorporates air and dissolves the sugar slightly.
- Add Wet Ingredients (1 minute): Add the eggs and vanilla extract to the butter mixture. Whisk again until fully combined. The mixture might look a bit curdled at first, but that’s okay. It will come together once you add the flour.
- Combine Dry Ingredients (1 minute): In a separate medium bowl, whisk together the flour, baking soda, and salt. Make sure there are no lumps of baking soda.
- Combine Wet and Dry (2 minutes): Gradually add the dry ingredients to the wet ingredients. Mix on low speed or by hand until just combined. Do not overmix. Stop as soon as you no longer see streaks of flour. Overmixing develops gluten, which makes cookies tough.
- Fold in Chocolate (1 minute): Add the chocolate chips and fold them in gently with your spatula. Ensure they are evenly distributed.
- Chill the Dough (30 minutes to 24 hours): Cover the bowl with plastic wrap and refrigerate. This step is non-negotiable for chewy cookies. It allows the flour to hydrate and the flavors to meld. If you’re in a rush, 30 minutes is the minimum. Overnight is best.
- Preheat Oven (5 minutes): Preheat your oven to 350°F (175°C). Line two baking sheets with parchment paper.
- Scoop Dough (5 minutes): Use a cookie scoop or a tablespoon to portion the dough. Roll them into balls. For uniform baking, try to make them all the same size. Place them on the baking sheets, leaving 2 inches between each cookie.
- Bake (10-12 minutes): Place in the oven. Bake for 10-12 minutes. The edges should be golden brown, but the centers should still look slightly soft and underbaked. They will firm up as they cool. (Note: If your oven runs hot, check at 9 minutes.)
- Add Salt (1 minute): Immediately upon removing from the oven, sprinkle with flaky sea salt.
- Cool on Pan (5 minutes): Let the cookies sit on the hot baking sheet for 5 minutes. This allows them to set. Then, transfer to a cooling rack to cool completely.
If you find your cookies spreading too much, your butter might have been too hot when you mixed it. Next time, let it cool longer. If they are too cakey, you might have packed the flour too tightly. Spoon and level next time.
Cooking Tips & Techniques
Getting that perfect chewy texture requires a few pro tips that separate amateur bakers from experts. I’ve learned these through trial and error, including a few burnt batches and flat disasters.
Temperature Control is Key: Your butter should be warm, not hot, when you mix it with the sugar. If it’s too hot, it will cook the eggs slightly and create a greasy cookie. If it’s too cold, it won’t mix well. Aim for a temperature that feels like warm baby formula.
Don’t Overbake: This is the biggest mistake people make. Cookies continue to cook on the hot pan after you take them out of the oven. You want to pull them out when they look slightly underdone in the center. The edges should be set, but the middle should still jiggle a little. This ensures a soft, chewy center.
Chill Your Baking Sheets: If you are baking multiple batches, let your baking sheets cool down completely before adding new dough. Hot pans will cause the cookies to spread instantly, leading to flat, crispy edges instead of chewy centers.
Measure Flour Correctly: Flour is the most variable ingredient. If you scoop it directly from the bag with the measuring cup, you can pack it down, leading to dry, crumbly cookies. Always spoon the flour into the measuring cup and level it off with a knife. This ensures you use the right amount of flour.
Multitasking Strategy: While the butter is cooling, prep your dry ingredients. While the dough is chilling, preheat your oven and line your sheets. This workflow keeps you organized and ensures everything is ready to go the moment the dough is chilled.
Consistency Check: If your dough seems too dry after chilling, add a teaspoon of milk. If it’s too wet, add a tablespoon of flour. But usually, the recipe is balanced perfectly if you measure correctly.
Variations & Adaptations
While the classic version is my favorite, these cookies are a blank canvas. Here are some ways to mix it up.
- White Chocolate Macadamia: Swap the chocolate chips for white chocolate chips and add 1 cup of toasted macadamia nuts. The nuttiness pairs beautifully with the browned butter.
- Peanut Butter Chip: Use peanut butter chips instead of chocolate. For an extra kick, add a swirl of peanut butter into the dough before baking.
- Gluten-Free: Use a 1:1 gluten-free flour blend. Add ½ teaspoon of xanthan gum if your blend doesn’t include it. The texture might be slightly more crumbly, but still delicious.
- Vegan: Use vegan butter sticks and dairy-free chocolate chips. You may need to add a flax egg (1 tbsp ground flaxseed mixed with 3 tbsp water) per egg. The cookies might spread slightly more.
- Sea Salt Caramel: Add small chunks of caramel candy into the dough before baking. Top with extra flaky salt. This is a decadent twist that feels gourmet.
I once tried adding chopped pretzels for a salty-sweet crunch. It was amazing, but I found it overwhelmed the chocolate flavor. Stick to one or two mix-ins to keep the balance right. These variations are great for using up ingredients you have on hand.
Serving & Storage Suggestions
These cookies are best served warm, straight out of the oven, with a cold glass of milk. The warmth makes the chocolate melt and the buttery flavor shine. But they are also great at room temperature.
Storage: Store cookies in an airtight container at room temperature for up to 5 days. Place a slice of bread in the container with the cookies. The bread will release moisture, keeping the cookies soft and chewy for longer. This is a classic baker’s trick.
Freezing Dough: You can freeze the cookie dough balls. Scoop them onto a baking sheet and freeze until solid. Then transfer to a freezer bag. You can bake them straight from frozen, just add 1-2 minutes to the bake time. This is perfect for having fresh cookies on demand.
Freezing Baked Cookies: Once cooled, freeze baked cookies in a single layer. Then transfer to a freezer bag. They will last for 3 months. Thaw at room temperature before serving.
Reheating: If you make them a day ahead, warm them in the microwave for 10 seconds before serving. It restores that fresh-baked texture.
The flavors actually deepen after a day or two. The browned butter flavor becomes more pronounced, and the cookies get even chewier. So don’t be surprised if day two is even better than day one.
Nutritional Information & Benefits
While these are definitely a treat, understanding the nutritional profile helps you enjoy them mindfully. One medium cookie contains approximately 180-200 calories. The primary sources of calories are fat from the butter and chocolate, and carbohydrates from the sugar and flour.
Health Benefits: Dark chocolate chips, if used, contain antioxidants called flavonoids, which can be good for heart health. Eggs provide high-quality protein and choline, which is good for brain health. Butter provides fat-soluble vitamins like A, D, E, and K.
Dietary Considerations: These cookies contain gluten, dairy, and eggs. They are not suitable for those with celiac disease, dairy allergies, or egg allergies without significant substitutions. For a lower sugar option, you can reduce the granulated sugar by ¼ cup, though the texture will be slightly less chewy.
Allergens: Wheat, Milk, Eggs. If you have nut allergies, ensure your chocolate chips are made in a nut-free facility.
I view these cookies as a mindful indulgence. They are best enjoyed slowly, savoring the texture and flavor. They bring joy, and that emotional benefit is part of the wellness picture too. Balance is key.
Conclusion
These chewy bakery-style chocolate chip cookies are more than just a recipe; they are a source of comfort and connection. The process of browning the butter and waiting for the dough to chill teaches patience, and the reward is well worth it. The combination of crispy edges and a soft, fudgy center is simply unmatched.
I encourage you to make this recipe your own. Maybe you’ll add nuts, or maybe you’ll stick to the classic version. Whatever you choose, the base recipe is solid and reliable. It’s a great way to practice your baking skills and impress your friends and family.
I love this recipe because it never fails. It’s my go-to for every occasion. Whether it’s a birthday, a holiday, or just a random Tuesday, these cookies always hit the spot. They remind me of simpler times and happy memories.
If you try this recipe, I’d love to hear how it turns out for you. Leave a comment below with your thoughts. Did you add any extra mix-ins? How did your browning go? Share your experiences and inspire others to bake. And don’t forget to share a photo on social media—I love seeing your creations!
Happy baking! May your kitchen always smell like warm cookies and your heart always be full.
Frequently Asked Questions
Why are my cookies flat?
This usually happens if the butter was too warm when mixed with the sugar, or if the dough wasn’t chilled enough. Make sure to chill the dough for at least 30 minutes. Also, ensure you are measuring your flour correctly by spooning it into the cup.
Can I use salted butter instead of unsalted?
Yes, you can. However, you should reduce the added salt in the recipe by half. Salted butters vary in salt content, so taste the dough if possible, or just go with less salt to be safe.
How do I know when the butter is browned?
Watch for the foam to subside and small brown specks to appear at the bottom of the pan. The smell will change from sweet butter to a nutty, toasted aroma. It takes about 3-5 minutes. Remove from heat immediately once you see the specks.
Can I freeze the cookie dough?
Absolutely. Scoop the dough into balls and freeze them on a baking sheet. Once solid, transfer to a freezer bag. Bake straight from frozen, adding 1-2 minutes to the baking time.
Why do my cookies spread too much?
This can be caused by using butter that is too soft, an oven that runs too hot, or too much sugar relative to flour. Make sure your oven is properly preheated and use a kitchen thermometer to check the actual temperature. Chilling the dough also helps prevent spreading.
Pin This Recipe!
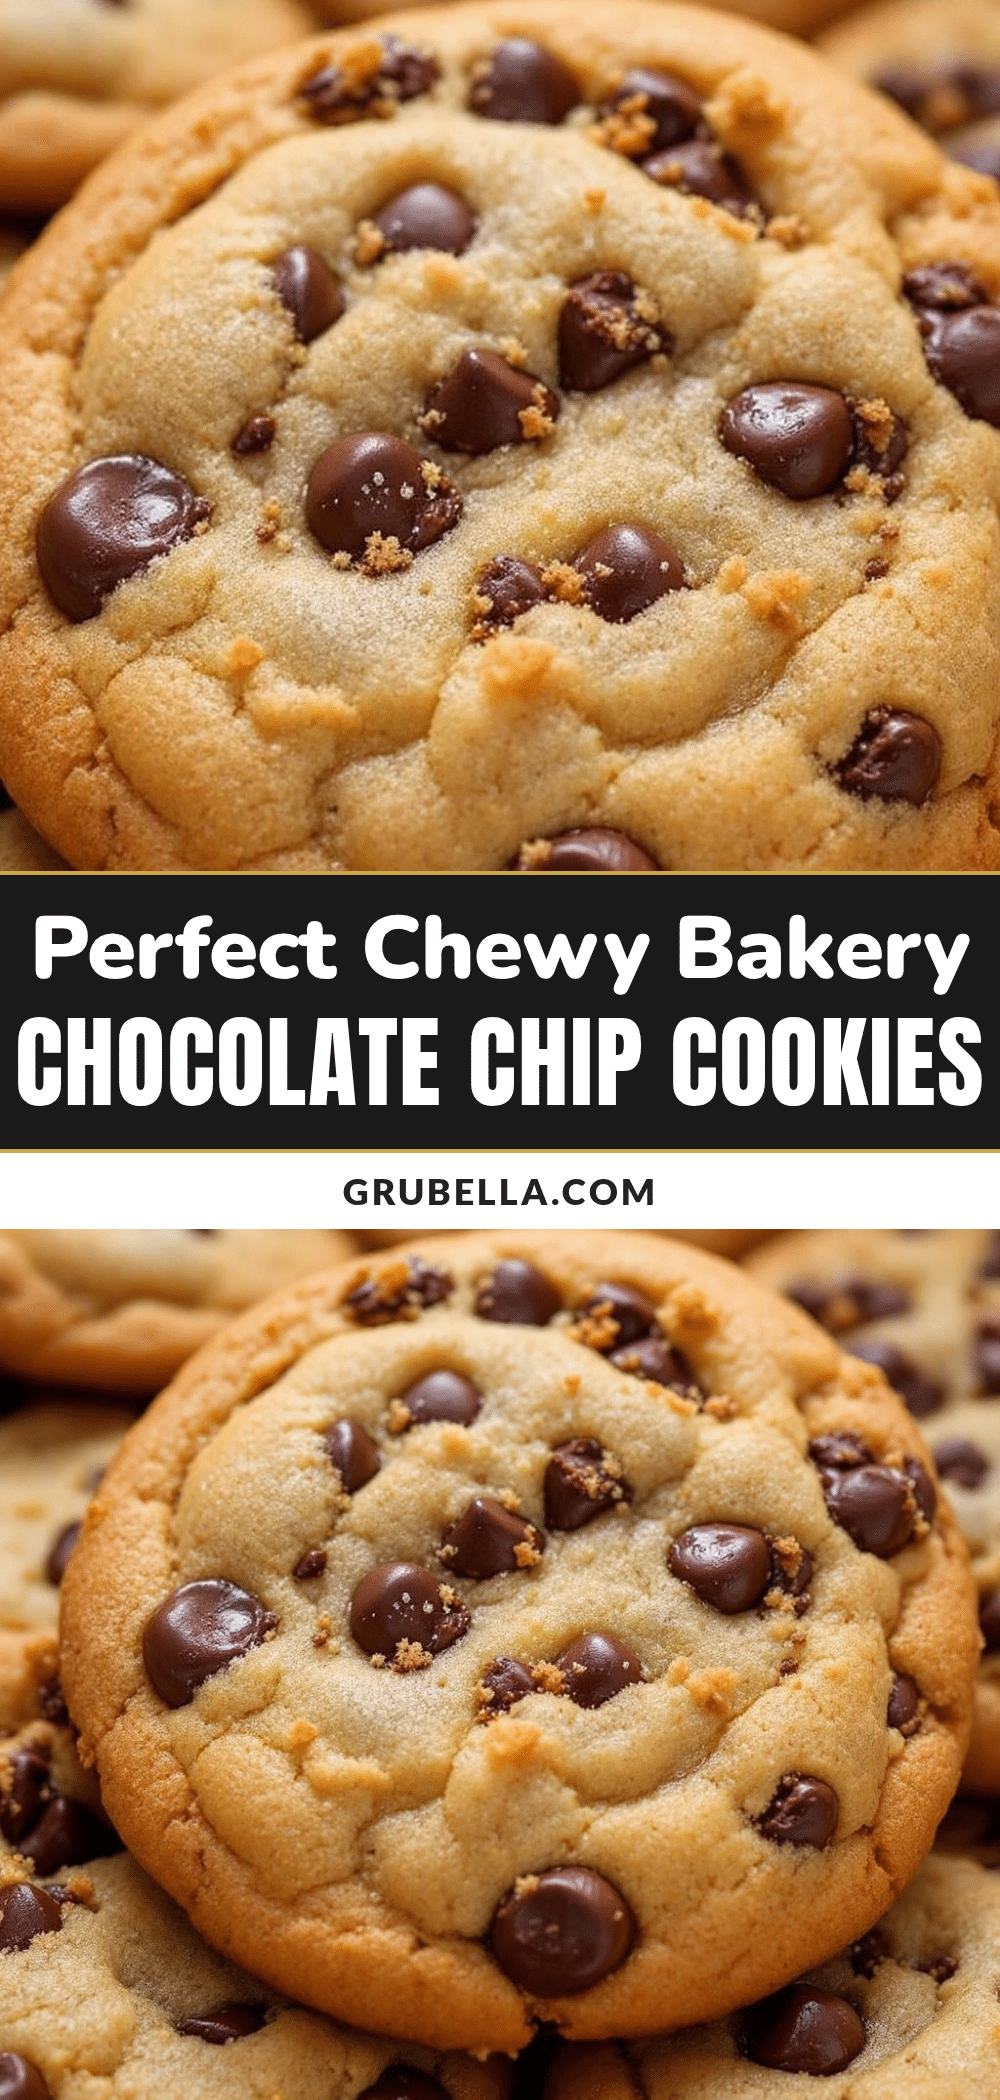
Chewy Bakery-Style Chocolate Chip Cookies

These chewy bakery-style chocolate chip cookies feature browned butter for a nutty depth of flavor and a dense, fudgy center. The secret lies in chilling the dough and mixing melted butter directly with sugars for the perfect texture.
- Prep Time: 20 minutes
- Cook Time: 12 minutes
- Total Time: 45 minutes
- Yield: 24 servings 1x
- Category: Dessert
- Cuisine: American
Ingredients
- 1 cup (226g) unsalted butter
- 1 ½ cups (300g) light brown sugar
- ½ cup (100g) granulated sugar
- 2 large eggs, room temperature
- 2 tsp pure vanilla extract
- 2 ½ cups (315g) all-purpose flour
- 1 tsp baking soda
- 1 tsp salt
- 2 cups chocolate chips (mix of semi-sweet and milk)
- Flaky sea salt, for topping
Instructions
- Brown the butter in a heavy-bottomed saucepan over medium heat until it smells nutty and has brown specks. Pour into a heatproof bowl and let cool for 10 minutes.
- In a large mixing bowl, combine the cooled browned butter with brown sugar and granulated sugar. Whisk vigorously for 2 minutes until smooth and glossy.
- Add eggs and vanilla extract to the butter mixture. Whisk until fully combined.
- In a separate medium bowl, whisk together flour, baking soda, and salt.
- Gradually add dry ingredients to wet ingredients. Mix on low speed or by hand until just combined. Do not overmix.
- Fold in chocolate chips gently with a spatula.
- Cover the bowl with plastic wrap and refrigerate the dough for at least 30 minutes (or up to 24 hours).
- Preheat oven to 350°F (175°C). Line two baking sheets with parchment paper.
- Scoop dough into balls and place on baking sheets, leaving 2 inches between each cookie.
- Bake for 10-12 minutes until edges are golden brown but centers look slightly soft.
- Immediately upon removing from oven, sprinkle with flaky sea salt.
- Let cookies sit on the hot baking sheet for 5 minutes, then transfer to a cooling rack to cool completely.
Notes
Do not burn the butter; it goes from perfect to bitter in seconds. Ensure butter is warm, not hot, when mixing with sugar to avoid cooking the eggs. Spoon and level flour for accurate measurement. Chilling the dough is essential for chewy texture. Cookies continue to cook on the hot pan after removal from the oven.
Nutrition
- Serving Size: 1 medium cookie
- Calories: 190
- Sugar: 16
- Sodium: 150
- Fat: 10
- Saturated Fat: 6
- Carbohydrates: 24
- Fiber: 1
- Protein: 2
Keywords: chocolate chip cookies, bakery style, chewy cookies, browned butter, easy baking, dessert, homemade cookies