Love this? Save it for later!
Share the inspiration with your friends
I can still hear the exact tone my sister-in-law used when I pulled the dish out of the oven last Thanksgiving. It wasn’t mean, but it had that specific edge of skeptical surprise, the kind reserved for culinary crimes against humanity. She pointed her fork at the golden, bubbling top and asked if I was trying to make dessert or a side dish. Honestly, I didn’t blame her. When I first started making this creamy sweet corn casserole with Jiffy mix, I felt like I was cheating too.
It felt like taking the easy way out, relying on a box mix from the baking aisle instead of grinding my own corn or making a complex custard from scratch. But here is the thing about life at the holiday table: you don’t have time for complicated. You need something that tastes like comfort, smells like home, and actually tastes good. And let’s face it, nobody wants to bring a dry, overcooked vegetable dish to a gathering where everyone is already full.
This recipe changed my life because it struck that perfect balance between lazy and delicious. It’s sweet, it’s savory, and it has this incredible texture that is part crisp, part custard. My sister-in-law’s skepticism vanished within seconds of her first bite. She actually went back for seconds, which is the highest praise I can give in my family. If you are looking for a dish that saves you time without sacrificing flavor, this is the one to beat.
I’ve made this for potlucks, quick weeknight sides, and big holiday dinners. It always works. It’s reliable, unlike my sourdough starter, which is currently judging me from the counter. Once you try this version, you’ll understand why it’s become a staple in my kitchen. It’s not just cornbread batter with corn thrown in. It’s a specific alchemy of ingredients that creates something greater than the sum of its parts.
Why You’ll Love This Recipe
There is a reason this creamy sweet corn casserole with Jiffy mix has taken over social media feeds and family group chats alike. It isn’t just a trend; it’s a triumph of simple cooking. I’ve tested dozens of corn casserole recipes over the years, from scratch versions that require three cups of buttermilk to fancy ones with smoked bacon and jalapeños. This one wins because it respects your time while delivering professional-quality results.
- Quick & Easy: You can have this prepped and in the oven in less than 15 minutes. It is perfect for those weeknights when you’re tired, or for last-minute holiday prep when you’re overwhelmed by the main course.
- Simple Ingredients: You likely have almost everything you need right now. If you have a box of Jiffy mix, eggs, sour cream, and butter, you are halfway done. No fancy grocery trips or obscure spices needed.
- Perfect for Potlucks: This dish travels well. It holds its temperature in a slow cooker or a chafing dish without breaking or becoming watery. It’s the safest bet to bring to a gathering where you don’t know what else people are bringing.
- Crowd-Pleaser: Kids love the sweetness. Adults love the savory depth. It bridges the gap between a vegetable side and a bread side, satisfying everyone at the table.
- Unbelievably Delicious: The texture is the star. You get a crispy, buttery crust on top, while the inside remains soft, custardy, and rich. It’s comfort food in its purest form.
What makes this recipe different from the rest is the ratio of wet to dry ingredients. Many people just dump the box in and add water, but that leads to a dense, bread-like result. By using sour cream and melted butter, you create an emulsion that bakes into a tender crumb. It’s not just another version; it’s the optimized version that I’ve refined over years of trial and error.
This recipe isn’t just good—it’s the kind that makes you close your eyes after the first bite. It’s nostalgic, hitting that specific memory of a grandmother’s kitchen, but it’s modern enough to fit into a busy lifestyle. It’s perfect for impressing guests without stress, or turning a simple meal into something memorable.
What Ingredients You Will Need
This recipe uses simple, wholesome ingredients to deliver bold flavor and satisfying texture without the fuss. The magic here is in the balance. You need enough fat to keep it moist, enough sweetness to contrast the savory corn, and enough structure to hold it together. Most of these items are pantry staples, which is why I always keep a box of corn muffin mix on hand.
- Jiffy Corn Muffin Mix (1 box): This is the base. I recommend the standard yellow corn muffin mix for that classic, nostalgic flavor. Do not use the white corn version unless you specifically prefer a milder taste, as the yellow provides a better color contrast.
- Whole Kernel Sweet Corn (1 can): Use a 15.25 oz can. Look for a brand that includes the corn juice (liquor) in the can. That starchy liquid is crucial for the custard-like texture. Do not drain it completely; that juice is liquid gold.
- Creamed Corn (1 can): Another 15.25 oz can. This provides the creamy base. I prefer brands like Bush’s Best or Del Monte for their consistent texture. This is what makes the casserole rich and smooth.
- Sour Cream (1 cup): Full-fat is non-negotiable here. Light sour cream will result in a drier casserole. The tanginess of the sour cream cuts through the sweetness of the corn and the Jiffy mix, balancing the flavor profile perfectly.
- Unsalted Butter (1/2 cup): Melted. Using unsalted allows you to control the salt level, especially since the Jiffy mix already contains some salt. High-quality butter makes a noticeable difference in the final crust.
- Eggs (2 large): Room temperature eggs blend better into the batter, creating a more uniform texture. They provide the structure and help the casserole set as it bakes.
- Salt (optional): Taste the batter before baking. The Jiffy mix and canned corn already have sodium, so you might not need any extra. Add a pinch only if you feel it needs more savory punch.
If you are looking for substitutions, you can use frozen corn if you thaw and drain it, but you will need to add a little extra liquid since you lose the canned juice. For a dairy-free option, you can swap the butter for coconut oil and the sour cream for a high-fat coconut yogurt, though the texture will be slightly different.
Equipment Needed
You don’t need a lot of fancy gear to make this, which is part of its appeal. The most important piece of equipment is a 9×9 inch square baking dish. This size is ideal because it creates the perfect depth for the casserole to cook evenly. A 9×13 dish will work, but the casserole will be thinner, leading to more browning and potentially less custardy center.
You will also need a medium mixing bowl. A glass or ceramic bowl is best so you can see the batter consistency as you mix. Avoid metal bowls if you are using a whisk, as they can get slippery. A sturdy silicone spatula is essential for scraping the sides of the bowl to ensure all the Jiffy mix is incorporated. If you miss dry pockets, you’ll end up with weird bits of uncooked batter in your final dish.
An oven that preheats evenly is key. If your oven has hot spots, consider rotating the dish halfway through baking. A measuring cups and spoons set helps ensure accuracy, though this recipe is forgiving. I usually just eyeball the sour cream and butter, but for the Jiffy mix, sticking to the box amount is best. If you have a hand mixer, you can use it, but be careful not to overmix. Overmixing develops gluten, which can make the casserole tough instead of tender. A simple fork or whisk is sufficient.
Preparation Method

- Preheat your oven to 350°F (175°C). This is the standard temperature for baking casseroles. It allows the center to cook through without burning the top. While the oven heats, grab your 9×9 inch baking dish. You don’t strictly need to grease it if you use enough butter in the recipe, but a light spray of non-stick cooking spray ensures easy removal later.
- Melt the butter. Take your 1/2 cup of unsalted butter and melt it. You can do this in the microwave in 30-second intervals, stirring in between, or in a small saucepan over low heat. Let it cool for a minute so it doesn’t scramble the eggs when you add them. It should be liquid but not hot.
- Mix the wet ingredients. In your medium bowl, combine the melted butter, the 2 eggs, and the 1 cup of sour cream. Whisk these together until they are smooth and well combined. This creates your creamy base. You want a uniform, pale yellow mixture. If you see lumps of sour cream, keep whisking until they disappear.
- Add the corn. Pour in the entire can of whole kernel corn, including the juice. Then, add the entire can of creamed corn. Do not drain either. The liquid from the whole kernel corn is essential for moisture. Stir gently to distribute the corn kernels evenly throughout the wet mixture.
- Incorporate the Jiffy mix. Open your box of Jiffy corn muffin mix. Pour the dry mix into the wet ingredients. Use your spatula or whisk to fold it in. Mix until just combined. You will see streaks of dry mix at first; keep folding until they disappear. The batter will be thick and chunky. This is the correct consistency. Do not add extra flour or liquid.
- Pour into the baking dish. Transfer the batter into your prepared 9×9 inch baking dish. Use your spatula to smooth the top. You want a relatively even surface so it bakes uniformly. If there are large clusters of corn on top, gently press them down into the batter.
- Bake the casserole. Place the dish in the preheated oven. Bake for 45 to 50 minutes. You are looking for a golden-brown top and a set center. The edges should be bubbling vigorously. If the top starts browning too quickly, you can loosely tent it with aluminum foil for the last 10 minutes.
- Cool and serve. Remove the casserole from the oven and let it cool for 10 minutes. This resting period is crucial. It allows the custard to set fully, making it easier to cut into squares. Serve warm as a side dish with roasted chicken or pork chops.
How do I know when the casserole is done?
The best test is the “jiggle test.” Gently shake the pan. The center should be set and not wobble like liquid. A toothpick inserted into the center should come out clean or with just a few moist crumbs, not wet batter. If it’s still wet, give it another 5-10 minutes.
Cooking Tips & Techniques
Getting the texture right is the hardest part of making corn casserole. Here are some tips from my own kitchen failures to help you succeed.
Don’t overmix the batter. When you add the Jiffy mix, mix it only until the dry ingredients are moistened. If you mix it like cake batter, you’ll activate the gluten in the flour. This results in a tough, rubbery casserole instead of a tender, custard-like one. It’s okay if the batter looks a bit lumpy; that’s better than overworked dough.
Room temperature ingredients matter. If your eggs and sour cream are cold, they can cause the melted butter to seize up slightly, creating little globules of fat in your batter. Let your ingredients sit out for 30 minutes before you start. This ensures a smooth, homogenous mixture that bakes evenly.
The pan size is critical. I cannot stress this enough. Use a 9×9 inch pan. If you use a 9×13 pan, the batter is too shallow. It will dry out on top and cook too fast. If you use a smaller 8×8 pan, the center might not cook through before the top burns. The 9×9 size provides the ideal depth-to-surface-area ratio.
Check your oven temperature. Ovens vary. If your casserole is consistently burning on top but raw in the middle, your oven might be running hot. Use an oven thermometer to verify the actual temperature. If it’s hot, lower the rack position or reduce the oven temp by 25 degrees.
Resting time is not optional. When you pull a custard-based dish out of the oven, it is still setting. If you cut into it immediately, it will be soupy. Let it rest for at least 10 minutes. This allows the proteins to firm up and the flavors to meld, resulting in cleaner slices and better texture.
Variations & Adaptations
While the classic version is perfect, you can tweak this creamy sweet corn casserole with Jiffy mix to suit your tastes or dietary needs.
Spicy Kick: Add 1/2 teaspoon of cayenne pepper or a diced jalapeño to the batter. The heat contrasts beautifully with the sweet corn and creamy texture. This is a popular variation for game day parties.
Bacon Bits: Fold in 1/2 cup of cooked, crumbled bacon. The smoky, salty flavor of bacon elevates the dish significantly. Add it right before baking so it stays crisp.
Herb-Infused: Stir in 1 tablespoon of fresh chives or parsley. This adds a fresh, grassy note that cuts through the richness. It’s a great option for spring or summer meals.
Gluten-Free Option: Use a gluten-free corn muffin mix instead of the standard Jiffy. Check the label to ensure it’s certified gluten-free. The rest of the ingredients are naturally gluten-free, but cross-contamination can be an issue with some brands.
Dairy-Free: Swap the butter for coconut oil and the sour cream for a full-fat coconut yogurt or cashew cream. The flavor will be slightly different, but the texture will still be creamy and satisfying.
I once tried adding shredded cheddar cheese to this recipe. It worked well, but it changed the texture to be more like a savory cornbread pudding. If you want a cheesy version, add 1 cup of shredded cheddar. It’s delicious, but it’s a different dish than the classic custard-style casserole.
Serving & Storage Suggestions
This casserole is best served warm, right out of the oven. It pairs wonderfully with roasted meats, such as easy slow cooker salsa chicken or honey garlic baked salmon bites. The richness of the corn complements the savory proteins perfectly. It is also a great side for holiday meals, serving alongside turkey or ham.
Storage: Leftovers can be stored in an airtight container in the refrigerator for up to 4 days. The casserole will firm up as it cools, which is normal. To reheat, you can microwave individual portions for 30-60 seconds. For a better texture, reheat in the oven at 350°F for 15 minutes to restore the crisp top.
Freezing: You can freeze this casserole, but the texture may change slightly upon thawing. It is best to freeze it baked and fully cooled. Wrap the entire dish tightly in plastic wrap and then foil. Freeze for up to 3 months. Thaw in the refrigerator overnight and reheat in the oven.
The flavors actually improve after a day or two, as the corn absorbs more of the creamy sauce. If you are meal prepping, this is a great option to have ready for a quick side dish during the week.
Nutritional Information & Benefits
While this is a comfort food dish, it does have some nutritional merits. Corn is a good source of fiber, which aids in digestion. It also provides antioxidants like lutein and zeaxanthin, which are beneficial for eye health. The eggs provide high-quality protein, and the sour cream adds calcium.
A typical serving (1/16th of the pan) contains approximately 200-250 calories, depending on the specific brands of ingredients used. It is moderate in fat due to the butter and sour cream, and moderate in carbohydrates from the corn and muffin mix. It is not suitable for low-carb diets unless modified with almond flour or other substitutes.
For those with dietary restrictions, be aware that this recipe contains gluten, dairy, and eggs. It is not vegan or gluten-free in its standard form. However, the simplicity of the ingredients makes it easy to adapt for various needs. I always recommend checking labels for hidden allergens, especially in processed mixes like Jiffy.
From a wellness perspective, this recipe is about balance. It’s a treat, but it’s not overly sugary like a dessert. It satisfies a craving for carbs and fats without being excessively heavy. It’s a dish that brings joy, which is a vital part of a healthy relationship with food.
Conclusion
Making a creamy sweet corn casserole with Jiffy mix is one of the easiest ways to add a touch of home-cooked comfort to any meal. It requires minimal effort but delivers maximum satisfaction. Whether you are a seasoned cook or a beginner, this recipe is foolproof. It’s reliable, delicious, and always a hit.
I encourage you to try this recipe and make it your own. Add some bacon, swap in some jalapeños, or serve it with your favorite roast. The base is versatile enough to handle your creativity. Once you taste the result, you’ll see why this has become a staple in so many kitchens.
Please let me know how it turns out for you! I love hearing about your adaptations and seeing your photos. If you have questions, drop them in the comments below. And if you make this, don’t forget to tag me on social media so I can see your delicious creations. Happy cooking!
Frequently Asked Questions
Can I use frozen corn instead of canned corn?
Yes, you can use frozen corn. However, you must thaw it completely and drain the excess water. Since you lose the canned juice, you may need to add a tablespoon or two of milk or water to the batter to maintain the correct consistency. The texture will be slightly less creamy than with canned creamed corn.
Why is my casserole too runny?
If your casserole is runny, it might not have baked long enough, or you used a pan that is too large. Ensure you are using a 9×9 inch pan and bake for the full 45-50 minutes. Also, check that you didn’t drain the canned corn juice; that liquid is essential for the structure. If it’s still runny after resting, it may be undercooked.
Can I make this ahead of time?
Yes, you can prepare the batter the night before. Mix all the ingredients in the bowl, cover it tightly with plastic wrap, and refrigerate. In the morning, simply pour it into the baking dish and bake as directed. You may need to add a few extra minutes to the baking time since the batter will be cold.
Is Jiffy mix necessary?
While you can make cornbread from scratch, Jiffy mix provides the perfect balance of flour, cornmeal, sugar, and leavening agents. It saves time and ensures consistent results. If you don’t have Jiffy, you can use a generic brand of yellow corn muffin mix, but the flavor and texture may vary slightly.
How do I store leftovers?
Store leftovers in an airtight container in the refrigerator for up to 4 days. Reheat in the microwave or oven. The casserole will firm up as it cools, so allow it to sit at room temperature for 10 minutes before reheating for even warming.
Pin This Recipe!
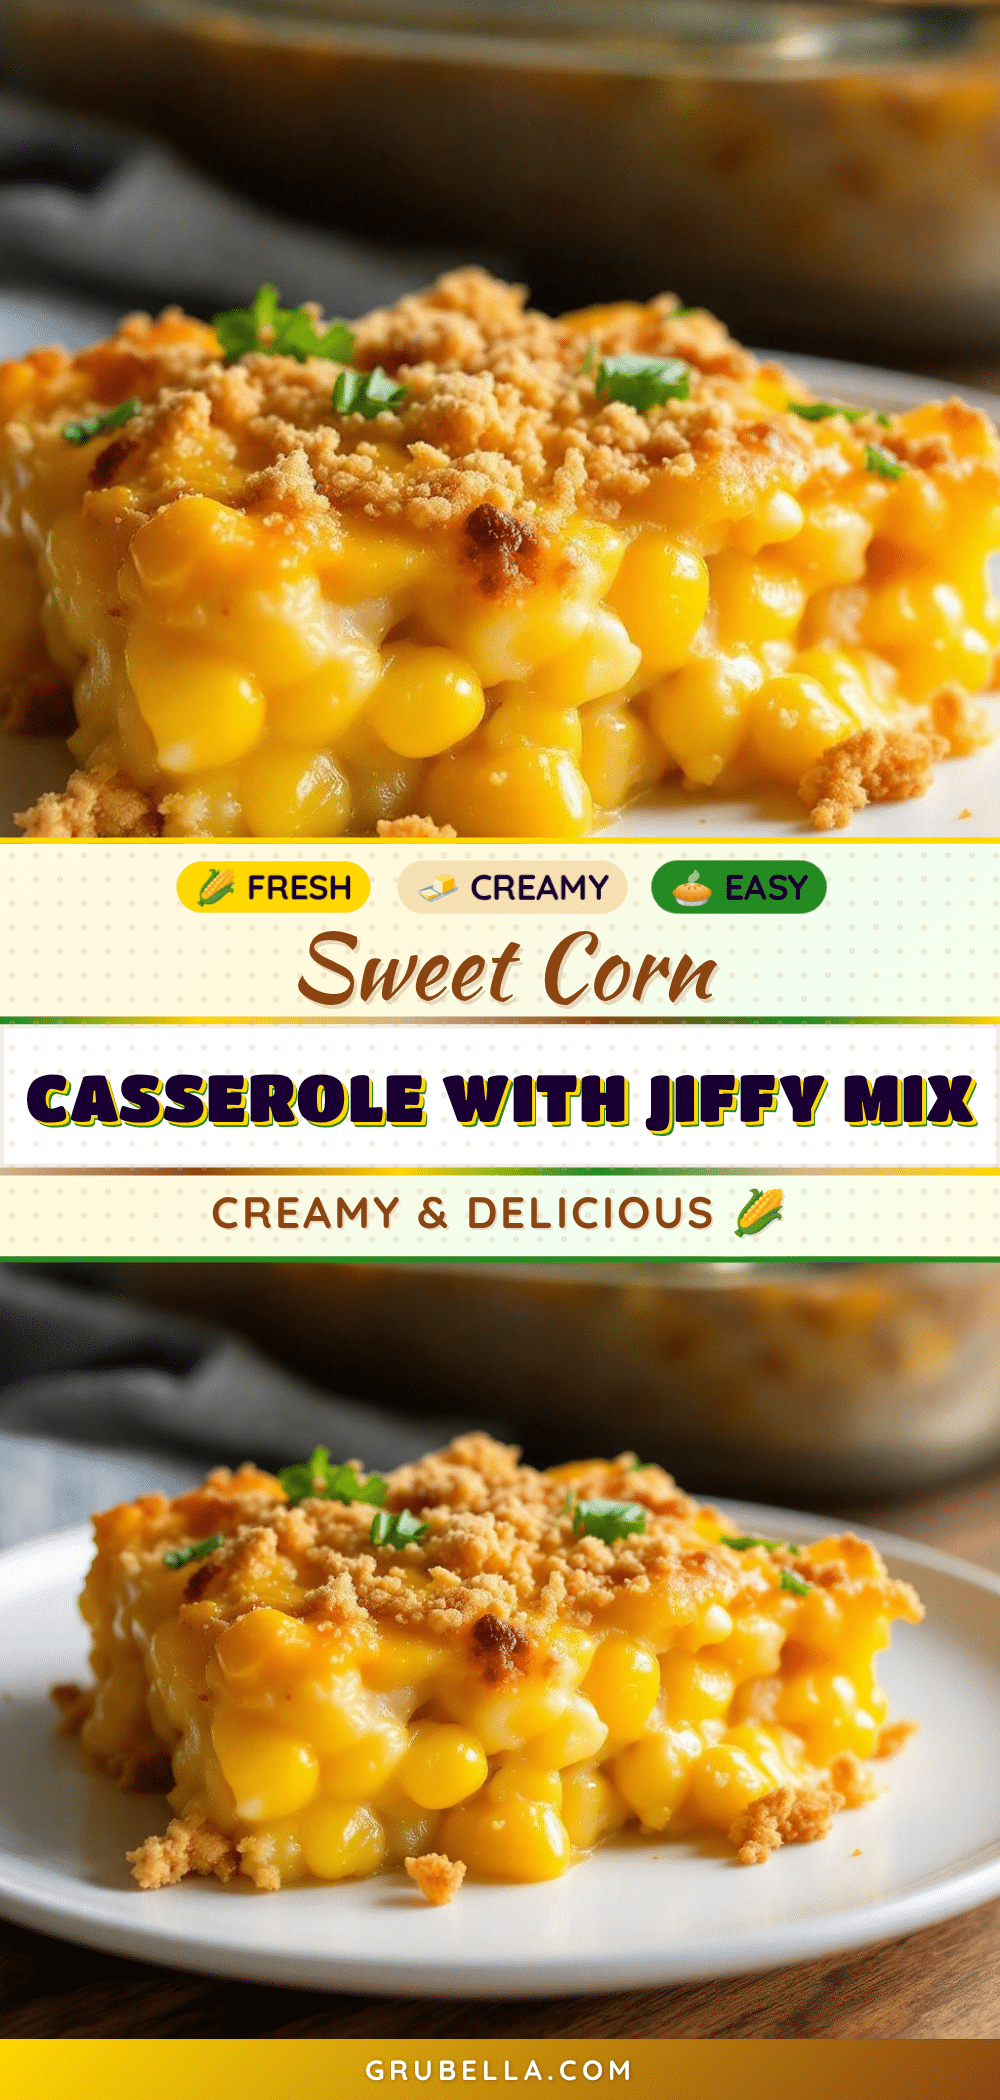
Creamy Sweet Corn Casserole with Jiffy Mix

A simple, comforting side dish that combines Jiffy corn muffin mix with canned corn, sour cream, and butter for a creamy, custard-like texture with a crispy top.
- Prep Time: 10 minutes
- Cook Time: 50 minutes
- Total Time: 1 hour
- Yield: 9 servings 1x
- Category: Side Dish
- Cuisine: American
Ingredients
- 1 box Jiffy Corn Muffin Mix (standard yellow)
- 1 can (15.25 oz) whole kernel sweet corn, including juice
- 1 can (15.25 oz) creamed corn
- 1 cup full-fat sour cream
- 1/2 cup unsalted butter, melted
- 2 large eggs, room temperature
- Salt (optional, to taste)
Instructions
- Preheat oven to 350°F (175°C). Lightly grease a 9×9 inch square baking dish.
- Melt the butter and let it cool slightly so it doesn’t scramble the eggs.
- In a medium mixing bowl, whisk together the melted butter, eggs, and sour cream until smooth.
- Add the whole kernel corn (with juice) and creamed corn to the wet mixture. Stir gently to combine.
- Pour in the Jiffy corn muffin mix. Fold in with a spatula or whisk until just combined. Do not overmix.
- Pour the batter into the prepared baking dish and smooth the top.
- Bake for 45-50 minutes, or until the top is golden brown and the center is set (not jiggly).
- Remove from oven and let cool for 10 minutes before serving.
Notes
Do not drain the canned corn juice; it is essential for the custard texture. Use a 9×9 inch pan for the correct depth; a 9×13 pan will result in a drier casserole. Let the casserole rest for 10 minutes after baking to allow it to set properly. Room temperature ingredients help create a smoother batter.
Nutrition
- Serving Size: 1/9th of the cassero
- Calories: 225
- Sugar: 6
- Sodium: 350
- Fat: 12
- Saturated Fat: 7
- Carbohydrates: 25
- Fiber: 2
- Protein: 4
Keywords: corn casserole, Jiffy mix, sweet corn, holiday side dish, easy recipe, comfort food, Thanksgiving



