Love this? Save it for later!
Share the inspiration with your friends
Third time this week and the leftmost finger still curled like a question mark. I stared at the cooling rack, waiting for that telltale snap, but instead, I got a soft, chewy collapse. Honestly, it was frustrating. I had just spent forty minutes piping these delicate, pale shapes onto parchment paper, only to watch them lose their structural integrity in the final hour of baking. The oven timer had gone off, but the magic hadn’t quite happened. These weren’t witch fingers; they were sad, melted nubs.
You know how it goes when you’re trying to nail a technique that feels impossibly precise? It’s like breathing underwater. I wiped my hands on my apron, the flour dust still clinging to my knuckles, and looked at the batch that had survived. The middle ones were perfect. Crisp. Shatteringly brittle. They looked exactly like the prop I’d seen in that old horror movie, complete with the almond nail beds I’d added as a last-minute afterthought.
I took a bite of the best one. It dissolved instantly, leaving just a hint of vanilla and sugar on my tongue. That was it. That was the hook. I didn’t care about the three ruined batches in the trash bin. I didn’t care that my kitchen looked like a sugar factory explosion. I just wanted to make more.
It’s strange how a simple meringue can become an obsession. I told myself I was done for the night, but my hand kept reaching for the piping bag. There’s something hypnotic about watching the whites turn from cloudy liquid to glossy, stiff peaks. It’s alchemy, really. You take nothing—just air and sugar—and you turn it into something that looks like magic. And for Halloween, nothing says magic like a cookie that looks like it belongs in a cauldron but tastes like a cloud.
I kept going until the bag was empty. The repetition wasn’t about perfection; it was about finding that sweet spot where the drying time meets the heat. Once I got it, the cookies didn’t just taste good. They felt like a victory. Now, they’re the only thing I make for October parties. They’re scary, they’re sweet, and they disappear before you can blink.
Why You’ll Love This Recipe
Why This Meringue Recipe Stands Out
Let’s be real for a second. Most meringue recipes feel like high-stakes chemistry experiments. One wrong move and you’re left with weepy, flat disks that stick to your teeth. This crispy witch finger meringue cookie recipe is different because it’s forgiving. I’ve tested this enough times to know that if you follow the piping technique, you get consistent results every single time. It’s not just about the flavor; it’s about the texture. We are aiming for that specific “snap” that makes you close your eyes when you bite into it.
Here is why this recipe earns a permanent spot in your Halloween baking rotation:
- Quick & Easy Prep: The actual mixing time is under ten minutes. You’re mostly waiting for the oven, which means you can tackle this while hosting a party or prepping other treats like our spiderweb chocolate peanut butter bark.
- Simple Ingredients: You don’t need fancy gadgets or obscure ingredients. Just egg whites, sugar, and a pinch of cream of tartar. If you have these in your pantry, you’re already halfway done.
- Perfect for Halloween Parties: These are visually striking without being intimidating. Kids love the spooky look, and adults appreciate the delicate sweetness. They pair wonderfully with other festive snacks, like mummy hot dogs, creating a full spooky spread.
- Crowd-Pleaser Texture: Unlike macarons that require hours of drying, these bake and cool relatively quickly. The result is a cookie that melts in your mouth, leaving no greasy residue.
- Unbelievably Delicious: The contrast between the crisp exterior and the slight airy chew inside is addictive. It’s pure sugar joy, reimagined as a spooky treat.
The secret isn’t in the ingredients; it’s in the technique. By piping these into tapered shapes and baking them at a low temperature for a long time, we drive out all the moisture. This ensures they stay crispy for days, which is crucial when you’re making them ahead of a party. It’s the kind of recipe that makes you look like a pro baker, even if you’re just winging it.
What Ingredients You Will Need
The Building Blocks of Crispiness
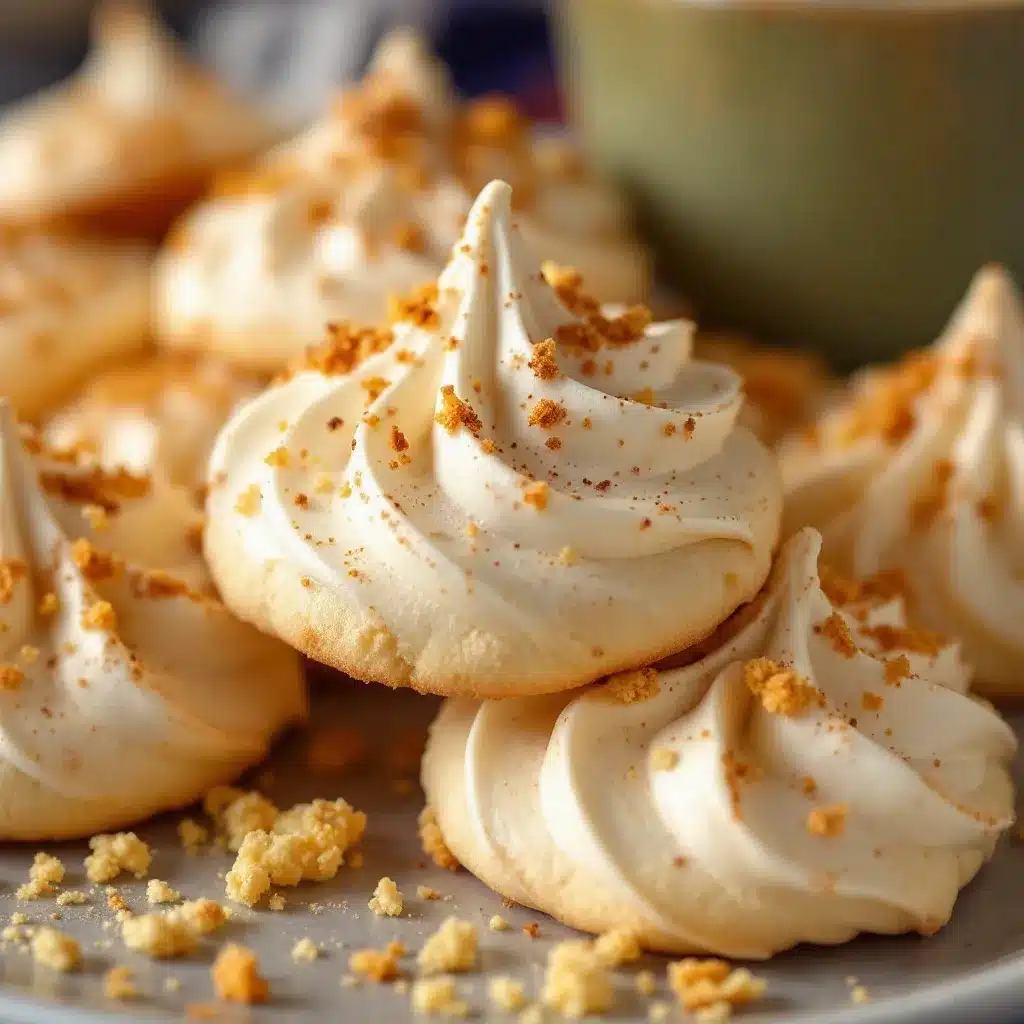
This recipe relies on the structural integrity of egg whites and the sweetness of granulated sugar. The ratio is critical. Too much sugar and the meringue becomes sticky; too little and it lacks body. I use standard large eggs because their protein content is consistent, which helps the foam hold its shape. For the sugar, I prefer superfine or caster sugar if you have it, as it dissolves faster, but regular granulated sugar works fine if you’re patient during the whipping stage.
Here is exactly what you need to gather before you start:
- Egg Whites: 3 large egg whites, room temperature. Room temperature whites whip up to a greater volume than cold ones. This is non-negotiable if you want those tall, sturdy witch fingers.
- Granulated Sugar: 3/4 cup (150g). This provides the structure and the crunch. Do not reduce this amount, or the cookies won’t crisp up properly.
- Cream of Tartar: 1/4 teaspoon. This is the acid that stabilizes the egg whites. It prevents the meringue from collapsing and helps it hold its piped shape during baking.
- Vanilla Extract: 1/2 teaspoon. Pure vanilla adds a warm, aromatic background note that balances the sweetness. Avoid imitation vanilla, as it can taste harsh.
- Almond Extract: 1/4 teaspoon. Optional, but highly recommended. This adds a subtle nutty flavor that pairs beautifully with the almond “nails.”
- Salt: A tiny pinch. Just enough to cut through the sweetness and enhance the overall flavor profile.
- Slivered Almonds: For the fingernails. You can use blanched slivered almonds or even candy eyes for a different look, but almonds look the most realistic.
I always recommend using fresh eggs. Older eggs separate easier, but fresh whites whip better. If your whites look watery or yellowish, toss them. You want them crystal clear. Also, ensure your mixing bowl is completely grease-free. Even a tiny drop of yolk or oil can ruin the entire batch, turning your stiff peaks into soup. I keep a separate bowl just for meringues to avoid cross-contamination.
Equipment Needed
Tools for the Job
You don’t need a professional kitchen to make these, but having the right tools makes the process infinitely less stressful. The most important piece of equipment is a stand mixer or a hand mixer. Mixing by hand is possible, but it takes serious arm strength and about twenty minutes of continuous whipping. A stand mixer with the whisk attachment is ideal because it provides consistent speed and power.
- Stand Mixer or Hand Mixer: Essential for whipping the egg whites to stiff peaks. Make sure the whisk attachment is clean and dry.
- Piping Bags: I use disposable piping bags for easy cleanup. If you don’t have them, you can use a gallon-sized ziplock bag with the corner snipped off, but a bag gives you better control over the shape.
- Piping Tip: A large round tip (like a Wilton 1A or similar) works best. It creates a thick enough rope to hold the finger shape without being too bulky. A star tip will create ridges that might break too easily.
- Baking Sheets: Two standard baking sheets. I line them with parchment paper or silicone baking mats. Parchment is better for this recipe because it allows air circulation and prevents sticking better than mats for delicate meringues.
- Cooling Rack: Optional, but helpful if you want to cool them quickly after baking. However, leaving them in the turned-off oven is the preferred method.
If you don’t have a piping bag, you can use a spoon to drop small mounds, but they won’t look like fingers. They’ll just be meringue kisses. The shape is key to the Halloween theme. Also, keep a small bowl of water nearby to wet your fingers if the meringue sticks to your hands while piping. It’s a small trick that saves a lot of frustration.
Preparation Method
Step-by-Step Instructions
Step 1: Prepare the Oven and Pans (5 minutes)
Preheat your oven to 225°F (107°C). This low temperature is crucial. It dries out the meringues slowly without browning them. If the oven is too hot, the outside will set too fast, trapping moisture inside, leading to cracks or soggy centers. Line two baking sheets with parchment paper. Ensure the parchment is flat and smooth; wrinkles can cause the cookies to stick or slide.
Step 2: Whip the Egg Whites (3 minutes)
Place the room-temperature egg whites in the bowl of your stand mixer. Add the cream of tartar and the pinch of salt. Start mixing on medium-low speed to break up the whites. Once you see loose bubbles, gradually increase the speed to medium-high. Whip until soft peaks form. This means when you lift the whisk, the peak droops over slightly. This usually takes about 2-3 minutes.
Step 3: Add the Sugar (3-5 minutes)
With the mixer running on medium-high, slowly pour in the granulated sugar. Do this one tablespoon at a time. If you dump it all in at once, the sugar won’t dissolve properly, and you’ll get a gritty texture. Continue whipping until the mixture is glossy, thick, and holds stiff peaks. When you lift the whisk, the peak should stand straight up without drooping. Rub a little meringue between your fingers; if it feels gritty, keep whipping. It should feel smooth like silk. This stage takes about 5-7 minutes total from the start.
Step 4: Flavor the Meringue (1 minute)
Stop the mixer and add the vanilla extract and almond extract. Use a rubber spatula to gently fold the extracts into the meringue. Be careful not to deflate the mixture. Fold just until the color is uniform. Over-mixing at this stage can introduce air bubbles that might cause cracking.
Step 5: Pipe the Fingers (10 minutes)
Transfer the meringue to a piping bag fitted with a large round tip. Pipe elongated, tapered shapes onto the parchment paper. Start wide at the base and narrow toward the top to resemble a finger. They should be about 3-4 inches long. Press a slivered almond into the top of each finger to create the nail bed. Gently press it in so it sticks, but don’t push it all the way through. Space them about 2 inches apart, as they won’t spread much.
Step 6: Bake and Dry (1 hour 30 minutes)
Place the baking sheets in the oven. Bake for 1 hour and 30 minutes. After this time, turn off the oven and crack the door open slightly using a wooden spoon. Let the meringues cool completely in the oven. This gradual cooling prevents thermal shock, which can cause cracking. They should be completely dry to the touch before you remove them.
Step 7: Remove and Store
Once cool, gently peel the meringues off the parchment paper. They should release easily. If they stick, they need more drying time. Store them in an airtight container at room temperature.
Cooking Tips & Techniques
Avoiding Common Meringue Mistakes
The number one reason meringues fail is grease. If your bowl or whisk has even a trace of oil or egg yolk, the whites will never whip properly. I wash my bowls with hot, soapy water, then wipe them down with a paper towel dipped in vinegar or lemon juice to ensure they are completely clean and dry. This small step makes a huge difference.
Another common issue is humidity. Meringues are hygroscopic, meaning they absorb moisture from the air. If you live in a humid climate, baking these on a dry day is best. You can also add them to the oven right after preheating, so the oven is at the correct temperature before they go in. If your oven has a convection setting, use it, but reduce the temperature by 25°F. Convection fans can dry out meringues too quickly, leading to cracks.
Don’t rush the sugar addition. If you add it too fast, the mixture can curdle or separate. Adding it slowly ensures it dissolves completely, resulting in a smooth, glossy finish. Also, be gentle when folding in the extracts. Use a figure-eight motion with your spatula, scraping the bottom and sides of the bowl. This preserves the air bubbles that give the cookies their light texture.
Finally, trust the cool-down process. Removing them from the oven while they are still warm is a mistake. They will be soft and chewy, not crispy. Let them sit in the turned-off oven until the oven is completely cool to the touch. This slow drying is the secret to that satisfying snap.
Variations & Adaptations
Customizing Your Spooky Treats
While the classic vanilla-almond flavor is my favorite, you can easily adapt this recipe to suit different tastes or dietary needs. The base meringue is very versatile.
- Chocolate Witch Fingers: Add 2 tablespoons of unsweetened cocoa powder to the dry ingredients before whipping. This creates a chocolate meringue that looks like burnt fingers. It’s intense and rich.
- Matcha Green: Replace the almond extract with 1 teaspoon of matcha powder. This gives them a vibrant green color, perfect for a “toxic” theme. Pair with white chocolate drizzle for contrast.
- Gluten-Free & Vegan: Traditional meringues are gluten-free by nature. For a vegan version, you can use aquafaba (the liquid from a can of chickpeas). Use 3 tablespoons of aquafaba per egg white. The whipping time will be longer, and the texture might be slightly less stable, so add extra cream of tartar (1/2 teaspoon) for support.
- Flavor Twists: Try using lemon zest or orange zest instead of vanilla. Citrus meringues are bright and refreshing. You can also add a drop of food coloring to the meringue for a purple or orange hue to match the Halloween theme.
I once tried making these with brown sugar instead of white sugar. The result was a chewier, more molasses-flavored cookie. It was delicious, but it lacked the crispiness of the white sugar version. If you want crunch, stick to granulated sugar. For a softer, marshmallow-like texture, you can slightly underbake them, but they will be sticky and best eaten immediately.
Serving & Storage Suggestions
How to Present and Keep Them Fresh
These cookies are best served at room temperature. Cold meringues can become chewy, so take them out of the fridge or freezer about 15 minutes before serving. They are perfect for Halloween parties, trick-or-treating favors, or as a dessert after a spooky movie night.
For storage, keep them in an airtight container at room temperature. They will stay crispy for up to two weeks. If your kitchen is humid, add a silica gel packet to the container to absorb excess moisture. Do not refrigerate them, as the condensation will ruin the texture. If you need to make them ahead, you can freeze them for up to three months. Thaw them in the sealed container to prevent condensation from forming on the cookies themselves.
I often package them in small cellophane bags tied with black ribbon for party favors. They look elegant and spooky. You can also stack them in a glass jar with a Halloween-themed label. They make a great gift for teachers or neighbors.
Nutritional Information & Benefits
Light and Airy Indulgence
Meringues are primarily sugar and air, which means they are low in fat and protein. A single witch finger meringue contains approximately 15-20 calories, depending on the size. They are naturally gluten-free, making them a safe option for those with celiac disease or gluten sensitivities.
However, because they are almost entirely sugar, they should be enjoyed in moderation. They provide a quick energy boost but lack sustained nutritional value. The lack of fat means they don’t leave a heavy feeling in the stomach, which is why they are popular as a light dessert. If you are watching your sugar intake, consider serving them alongside fresh fruit or a cup of herbal tea to balance the sweetness.
Conclusion
Making crispy witch finger meringue cookies is a rewarding experience that blends science with creativity. The process of whipping, piping, and baking requires patience, but the result is a treat that is as beautiful as it is delicious. These cookies are not just a Halloween novelty; they are a testament to the beauty of simple ingredients transformed by technique.
I encourage you to experiment with flavors and colors. Make them your own. Whether you stick to the classic vanilla or try a chocolate twist, the key is to enjoy the process. Share your creations with friends and family. I’d love to see your spooky bakes, so please leave a comment below with your tips or questions. Don’t forget to share this recipe with your baking buddies. Happy Halloween, and happy baking!
FAQs
Why are my meringues sticky?
If your meringues are sticky to the touch, they likely need more drying time in the oven. Turn off the oven and let them sit inside until the oven is completely cool. Humidity can also affect the texture, so ensure you are baking in a dry environment.
Can I use egg whites from a carton?
Yes, you can use pasteurized liquid egg whites from a carton. However, they may whip up slightly less voluminous than fresh eggs. You might need to whip them a bit longer to achieve stiff peaks.
How do I fix cracked meringues?
Cracks are common and often caused by high oven temperatures or adding sugar too quickly. To prevent this, ensure your oven is calibrated correctly and add the sugar slowly while whipping. Cracked meringues still taste great, so don’t worry about the appearance.
Can I make these vegan?
Yes, you can substitute egg whites with aquafaba. Use 3 tablespoons of aquafaba per egg white and add an extra 1/4 teaspoon of cream of tartar for stability. The whipping time will be longer, but the results can be surprisingly similar.
How long do these cookies last?
Stored in an airtight container at room temperature, these meringues will stay crispy for up to two weeks. If your kitchen is humid, they may soften sooner. Avoid refrigerating them to maintain their texture.
Pin This Recipe!

Crispy Witch Finger Meringue Cookies: Easy Halloween Treat

These spooky yet delicious meringue cookies are shaped like witch fingers with almond nail beds. They are crisp, shatteringly brittle, and perfect for Halloween parties.
- Prep Time: 15 minutes
- Cook Time: 1 hour 30 minutes
- Total Time: 1 hour 45 minutes
- Yield: Approximately 20-24 cookies 1x
- Category: Dessert
- Cuisine: American
Ingredients
- 3 large egg whites, room temperature
- 3/4 cup (150g) granulated sugar
- 1/4 teaspoon cream of tartar
- 1/2 teaspoon vanilla extract
- 1/4 teaspoon almond extract (optional)
- A tiny pinch of salt
- Slivered almonds, for fingernails
Instructions
- Preheat oven to 225°F (107°C). Line two baking sheets with parchment paper.
- Place egg whites, cream of tartar, and salt in a stand mixer bowl. Whip on medium-low until loose bubbles form, then increase to medium-high until soft peaks form.
- With mixer running on medium-high, slowly add granulated sugar one tablespoon at a time. Whip until glossy, thick, and holding stiff peaks.
- Stop mixer and gently fold in vanilla and almond extracts with a rubber spatula.
- Transfer meringue to a piping bag fitted with a large round tip. Pipe tapered finger shapes (3-4 inches long) onto parchment, spacing them 2 inches apart.
- Press a slivered almond into the top of each finger to create a nail bed.
- Bake for 1 hour and 30 minutes. Turn off the oven and crack the door open slightly with a wooden spoon. Let cool completely in the oven.
- Gently peel cookies off parchment and store in an airtight container at room temperature.
Notes
Ensure all equipment is completely grease-free and dry. Do not reduce sugar amount as it is needed for structure. If using convection, reduce temperature by 25°F. For vegan version, substitute egg whites with aquafaba (3 tbsp per egg white) and add extra cream of tartar.
Nutrition
- Serving Size: 1 cookie
- Calories: 18
- Sugar: 4
- Sodium: 5
- Carbohydrates: 4
Keywords: Halloween cookies, meringue recipe, witch fingers, easy dessert, gluten-free treat, spooky baking



