Love this? Save it for later!
Share the inspiration with your friends
My daughter stared at me with that specific, wide-eyed look that usually precedes a negotiation. It was 6 PM on a Tuesday in October, the air was getting crisp, and the neighborhood was already decked out in plastic skeletons. I was holding a bag of kale like it was a shield. She didn’t want kale. She didn’t want plain turkey slices. She wanted something that felt like the holiday itself—something spooky, fun, and undeniably delicious.
Let’s face it, trying to balance nutritious meals with the sheer chaos of Halloween prep is a losing battle if you don’t have a trick up your sleeve. I looked at the ingredients in our fridge and realized we already had the perfect solution. It wasn’t a salad. It was cheese. Lots of it. And tortillas. And a cookie cutter. That night, we didn’t just make dinner; we made a memory. The kids spent an hour cutting out faces, giggling as they pressed eyes and noses into the cheese. By the time they melted, the “healthy” debate was forgotten.
These Fun Jack-O-Lantern Cheese Quesadillas are exactly what you need when you’re short on time but big on creativity. They turn a simple pantry staple into a festive centerpiece. You know how sometimes a recipe just clicks? This is one of those moments. It’s not about reinventing the wheel; it’s about making the wheel look like a pumpkin. I’ve made these for school parties, last-minute playdates, and lazy Sunday nights. They always win. Honestly, the best part isn’t even the taste, though the melted cheddar is pretty great. It’s the look on their faces when they realize their food is a character. I haven’t thought about meal prep stress the same way since that Tuesday night. Now, I just grab a cookie cutter and smile.
Why You’ll Love This Recipe
There is a reason this recipe has become a staple in my kitchen during the spooky season. It bridges the gap between a quick weeknight snack and a festive activity that keeps the kids engaged. Here is why these Jack-O-Lantern Cheese Quesadillas are worth the extra five minutes of cutting:
- Quick & Easy: From start to finish, you are looking at about 15 minutes. That is perfect for busy weeknights when you need to get dinner on the table before the sugar rush hits, or for last-minute Halloween party snacks that need to look impressive.
- Simple Ingredients: You likely already have everything in your kitchen. Flour tortillas, shredded cheese, and a cookie cutter. No fancy grocery trips needed. It relies on wholesome, simple foods that most families already stock.
- Perfect for Halloween Parties: Whether it’s a classroom exchange or a backyard haunt, these are easy to hold and eat. They are finger food that doesn’t get messy, which is a huge win for parents and teachers alike.
- Crowd-Pleaser: Kids love the shape, and adults love the comfort food aspect. It’s a double win. Even the pickiest eaters who usually refuse “fun” foods will dig in when it looks like a pumpkin.
- Unbelievably Delicious: The texture and flavor combo is next-level comfort food. The crispiness of the tortilla contrasts with the gooey, melted cheese. It’s savory, salty, and satisfying.
What makes this recipe different from the rest is the visual appeal combined with nutritional balance. Unlike easy mummy hot dogs, which can be heavy and processed, these quesadillas offer a lighter option that still feels indulgent. You can customize the cheese blend to reduce sodium or increase protein. It isn’t just good—it is the kind of meal that makes you close your eyes after the first bite and feel like you’ve nailed parenting. It’s comfort food reimagined—healthier, faster, but with the same soul-soothing satisfaction. Perfect for impressing guests without stress, or turning a simple meal into something memorable.
What Ingredients You Will Need
This recipe uses simple, wholesome ingredients to deliver bold flavor and satisfying texture without the fuss. The beauty of a quesadilla is its adaptability, but for the perfect Jack-O-Lantern, we need ingredients that melt well and hold their shape. Here is what you will need to get started:
- Flour Tortillas: You need medium-sized flour tortillas, about 8 inches in diameter. Flour tortillas are softer and easier to fold than corn tortillas, making them less likely to tear when you press the cookie cutter into them. I prefer brands like Mission or La Tortilla Factory for their durability.
- Shredded Cheddar Cheese: Sharp cheddar provides that classic, tangy punch. Use a block and shred it yourself if you can. Pre-shredded cheese often contains anti-caking agents like cellulose, which can prevent it from melting as smoothly and evenly. Freshly shredded cheese gives you that gooey, stretchy texture we love.
- Mozzarella Cheese: A mix of cheddar and mozzarella works best. The mozzarella adds the stretch and meltability, while the cheddar brings the flavor. If you are watching dairy intake, you can use a dairy-free shreds, though the melt might be slightly different.
- Butter or Olive Oil: You need a little fat to get that golden-brown crispness. Unsalted butter gives a rich flavor, but olive oil works well for a lighter, healthier profile. Just a light brush or spray is enough.
- Cookie Cutters: This is the secret weapon. You need small cookie cutters in the shapes of eyes, noses, and mouths. Pumpkin-shaped cutters are obvious, but using individual shapes for the facial features allows for more creativity. Plastic cutters are fine, but metal ones tend to cut cleaner.
- Optional Add-ins: If you want to boost the nutrition, you can add a handful of finely chopped spinach or diced bell peppers. Just make sure they are small enough so they don’t interfere with the cheese melting or the structural integrity of the quesadilla.
For the best results, keep your ingredients at room temperature if possible. Cold cheese takes longer to melt and can result in a soggy tortilla if you try to rush it. Also, look for tortillas that are fresh and pliable. If yours are stiff, warm them slightly in the microwave for 10 seconds before assembling. This makes them much easier to work with.
Equipment Needed
You don’t need a lot of fancy gear to pull this off, which is part of the appeal. Here is what you will need:
- Non-Stick Skillet: A 10-inch non-stick skillet is ideal. It ensures even heating and makes flipping easier. Cast iron is great too, but you need to make sure it is well-seasoned so the cheese doesn’t stick. If you don’t have a large skillet, you can cook two smaller quesadillas at a time in a smaller pan.
- Spatula: A thin, flexible spatula is your best friend here. You need something that can slide easily under the thin tortilla without tearing it. A wide spatula helps support the quesadilla when you flip it.
- Cookie Cutters: As mentioned, small cookie cutters for the facial features. You can use round cutters for eyes and noses, and a small triangle or V-shape for the mouth. Having a variety allows you to make different expressions.
- Pastry Brush or Spray Bottle: For applying the butter or oil evenly. A pastry brush gives you more control over the amount of fat used, helping to keep the quesadillas from becoming greasy.
- Sharp Knife or Pizza Cutter: Once cooked, you will need something sharp to slice the quesadilla. A pizza cutter is great for clean, quick slices, especially if you are cutting them into wedges for serving.
If you don’t have cookie cutters, you can use a small knife to carefully cut the shapes out of the tortilla before adding the cheese. Just be gentle. And remember, cleaning your skillet immediately after cooking is a tip I learned the hard way. Cheese residue hardens quickly and becomes a nightmare to scrub later.
Preparation Method
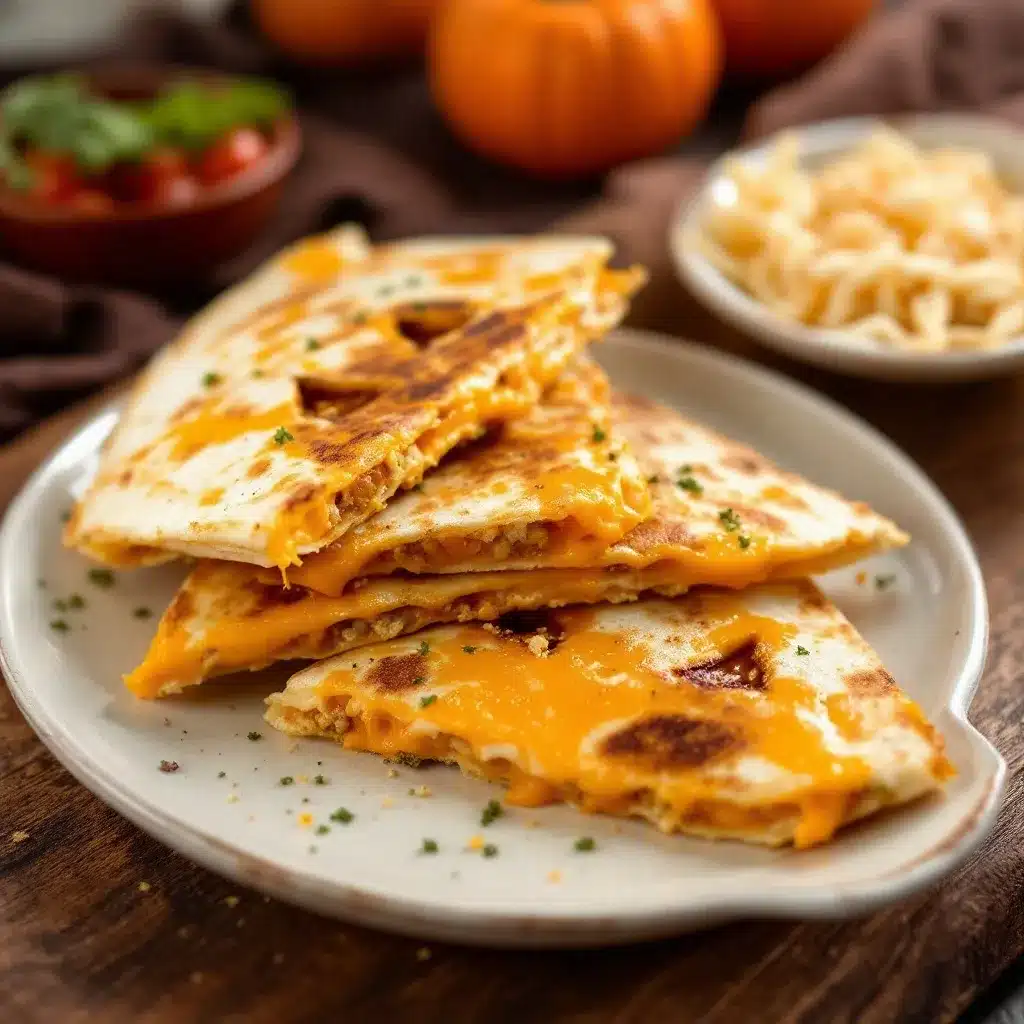
Let’s get into the nitty-gritty of making these adorable snacks. The process is straightforward, but attention to detail makes all the difference. Follow these steps for perfect results every time.
- Prepare Your Workspace (2 minutes): Gather all your ingredients and equipment. Lay out your tortillas on a clean surface. If your tortillas are very cold from the fridge, wrap them in a damp paper towel and microwave for 15-20 seconds. This makes them pliable and less likely to crack when you press the cookie cutters into them. Have your shredded cheese mixed in a bowl and your cookie cutters within easy reach.
- Assemble the Quesadilla (3 minutes): Take one tortilla and lay it flat. Sprinkle a generous layer of cheese over the entire surface, leaving a small border around the edge to prevent leaking. You want enough cheese to hold it together but not so much that it overflows. If you are adding veggies like spinach or peppers, sprinkle them over the cheese now.
- Create the Jack-O-Lantern Face (2 minutes): This is the fun part. Take your cookie cutters and press them into the top layer of cheese. You don’t need to cut all the way through the tortilla yet, just enough to mark the spots. Then, carefully lift the cheese out from those spots to create holes for the eyes and mouth. Alternatively, you can press the cutters into the tortilla itself to cut out shapes, then place the cheese around them. The first method is easier for beginners. Just be gentle so you don’t tear the tortilla.
- Heat the Skillet (2 minutes): Place your non-stick skillet over medium heat. Let it warm up for about a minute. Once hot, add a light layer of butter or olive oil. Swirl it around to coat the bottom evenly. You want a thin sheen, not a pool of oil. This ensures even browning without making the quesadilla greasy.
- Cook the First Side (3-4 minutes): Carefully place the assembled quesadilla into the skillet. Cook for about 3-4 minutes. You will know it is ready to flip when the bottom is golden brown and crispy. You can lift the edge slightly with a spatula to check. Do not rush this step; medium heat is key. High heat will burn the tortilla before the cheese melts.
- Flip and Cook the Second Side (2-3 minutes): Once the bottom is golden, use your spatula to flip the quesadilla carefully. Cook for another 2-3 minutes on the other side. The goal is to melt the cheese completely and get the other side of the tortilla to match the first side in color and crispness. The cheese should be bubbling through the holes you cut.
- Rest and Slice (1 minute): Remove the quesadilla from the skillet and place it on a cutting board. Let it rest for about one minute. This allows the cheese to set slightly, making it easier to slice without sliding apart. Use a pizza cutter or sharp knife to slice it into wedges. The Jack-O-Lantern face should be visible on top.
If you are cooking multiple quesadillas, wipe out the skillet between batches if any cheese residue remains. This keeps the flavor clean and prevents burning. Serve immediately while hot and gooey.
Cooking Tips & Techniques
Having cooked hundreds of quesadillas, I have learned a few tricks to ensure they come out perfect. The biggest mistake people make is using high heat. Medium heat is your best friend. It gives the cheese time to melt before the tortilla burns. If you see smoke, your pan is too hot.
Another tip is about the cheese. If you use pre-shredded cheese, toss it with a teaspoon of cornstarch. This helps absorb excess moisture and improves melting. But honestly, shredding your own block is worth the effort. It melts smoother and tastes better.
When flipping, don’t be afraid to use two spatulas if you are nervous about breaking it. Or, you can use the plate method: slide the quesadilla onto a plate, flip the pan over the plate, and let it slide back in. It’s a classic chef move that works every time.
Multitasking is key here. While one quesadilla is cooking, you can start assembling the next one. This speeds up the process significantly, especially if you are feeding a crowd. Just keep an eye on the one in the pan so it doesn’t overcook.
Consistency is also important. Try to use the same amount of cheese and tortillas for each quesadilla. This ensures they all cook at the same rate. If one is thicker, it will take longer, and you might end up with uneven results.
Finally, don’t skip the resting period. Hot cheese is molten lava. Letting it sit for a minute prevents burns and helps the structure hold together when you slice it. It’s a small step that makes a big difference in presentation and safety.
Variations & Adaptations
While the classic cheese version is a hit, there are many ways to customize these Jack-O-Lantern Cheese Quesadillas to suit different tastes and dietary needs.
- Spicy Version: Add some diced jalapeños or a sprinkle of cayenne pepper to the cheese mix for a kick. This is great for older kids or adults who like a bit of heat. Pair with a cool dipping sauce like sour cream or guacamole.
- Veggie-Packed: Finely dice bell peppers, onions, or mushrooms and mix them into the cheese. This adds volume and nutrition without compromising the flavor. Just make sure the veggies are small so they don’t weigh down the tortilla.
- Gluten-Free Option: Use gluten-free flour tortillas. Many brands now make excellent GF tortillas that are just as pliable as regular ones. Be careful not to overcook them, as they can become brittle.
- Dairy-Free: Use a high-quality dairy-free cheese shreds. Note that these may not melt as stretchy as dairy cheese, but they still provide the flavor. You can add a little nutritional yeast for a cheesy taste.
- Protein Boost: Add cooked, shredded chicken or black beans to the mix. This turns the snack into a more substantial meal. It’s a great way to use up leftover roast chicken or canned beans.
I once tried adding sweet potato cubes to the mix, and it was surprisingly good. The sweetness paired well with the cheddar. It’s a nice twist for autumn-themed meals. Don’t be afraid to experiment with flavors you like. The cookie cutter shape is just a fun wrapper for whatever filling you choose.
Serving & Storage Suggestions
These quesadillas are best served immediately while hot and crispy. Arrange them on a platter with the Jack-O-Lantern faces facing up. They look stunning on a black or orange plate for extra Halloween flair. Pair them with sides like a fresh green salad, fruit skewers, or a dip like salsa or guacamole. For beverages, apple cider or milk are great choices.
If you have leftovers, store them in an airtight container in the refrigerator for up to 3 days. To reheat, use a skillet over medium heat to restore crispiness. Avoid the microwave, as it will make the tortilla soggy. If you must use the microwave, do it in short bursts and follow up with a quick toast in the pan.
You can also freeze the assembled, uncooked quesadillas. Place them on a baking sheet and freeze until solid, then transfer to a freezer bag. They will keep for up to 2 months. Cook from frozen, adding a minute or two to the cooking time. This is a great option for meal prepping ahead of time.
Flavors develop over time, especially if you add veggies. The cheese will meld with the spices and vegetables, creating a deeper taste. However, the texture of the tortilla may soften slightly upon reheating. For the best experience, aim to eat them fresh.
Nutritional Information & Benefits
While these are a fun treat, they can be part of a balanced diet. A typical serving (one quesadilla) contains approximately 300-400 calories, depending on the size of the tortilla and amount of cheese. They provide protein from the cheese and carbohydrates from the tortilla. Using whole wheat tortillas can add fiber, which aids digestion. The cheese also provides calcium, which is essential for bone health. If you add veggies, you get additional vitamins and minerals. Just be mindful of sodium content in processed cheeses and tortillas. Opting for low-sodium options can help keep this recipe heart-healthy. Personally, I love that this recipe allows me to control the ingredients, avoiding the preservatives found in many packaged snacks. It’s a simple way to make a healthier choice without sacrificing fun.
Conclusion
Making Fun Jack-O-Lantern Cheese Quesadillas is more than just cooking; it’s about creating moments. It’s about seeing the joy on your child’s face as they dig into a snack that looks like the holiday itself. These quesadillas are easy, delicious, and incredibly fun to make. I encourage you to try them this Halloween and customize them to your liking. Add your favorite veggies, spice it up, or keep it classic. The possibilities are endless. I love this recipe because it brings my family together in the kitchen, even if it’s just for 15 minutes. So, grab your cookie cutters and let’s make some magic. Don’t forget to share your creations with me in the comments below! I love seeing how you customize these little pumpkins. Happy Halloween, and happy cooking!
Frequently Asked Questions
Can I use corn tortillas instead of flour tortillas?
Yes, you can use corn tortillas, but they are more brittle and may crack when you press the cookie cutters into them. Flour tortillas are softer and more forgiving, making them easier to work with for beginners. If you use corn tortillas, warm them thoroughly before assembling.
How do I prevent the cheese from leaking out?
To prevent leaking, leave a small border of tortilla around the edge without cheese. Also, avoid overfilling the quesadilla. Use a moderate amount of cheese, and make sure it is evenly distributed. Cooking on medium heat also helps the cheese melt slowly and bind the tortilla together.
Can I make these ahead of time for a party?
Yes, you can assemble them ahead of time and refrigerate them. However, it is best to cook them just before serving to ensure they are crispy and hot. If you must cook them ahead, reheat them in a skillet or oven to restore crispiness.
What dipping sauces go well with these quesadillas?
Classic dipping sauces include salsa, guacamole, sour cream, or a creamy jalapeño dip. For a sweeter twist, you can try a honey mustard dip, especially if you add sweet ingredients like corn or peppers.
Are these quesadillas kid-friendly?
Absolutely. The fun shape makes them appealing to kids, and the simple ingredients are usually well-tolerated. You can adjust the spice level and add veggies to suit their preferences. They are easy to hold and eat, making them perfect for little hands.
Pin This Recipe!
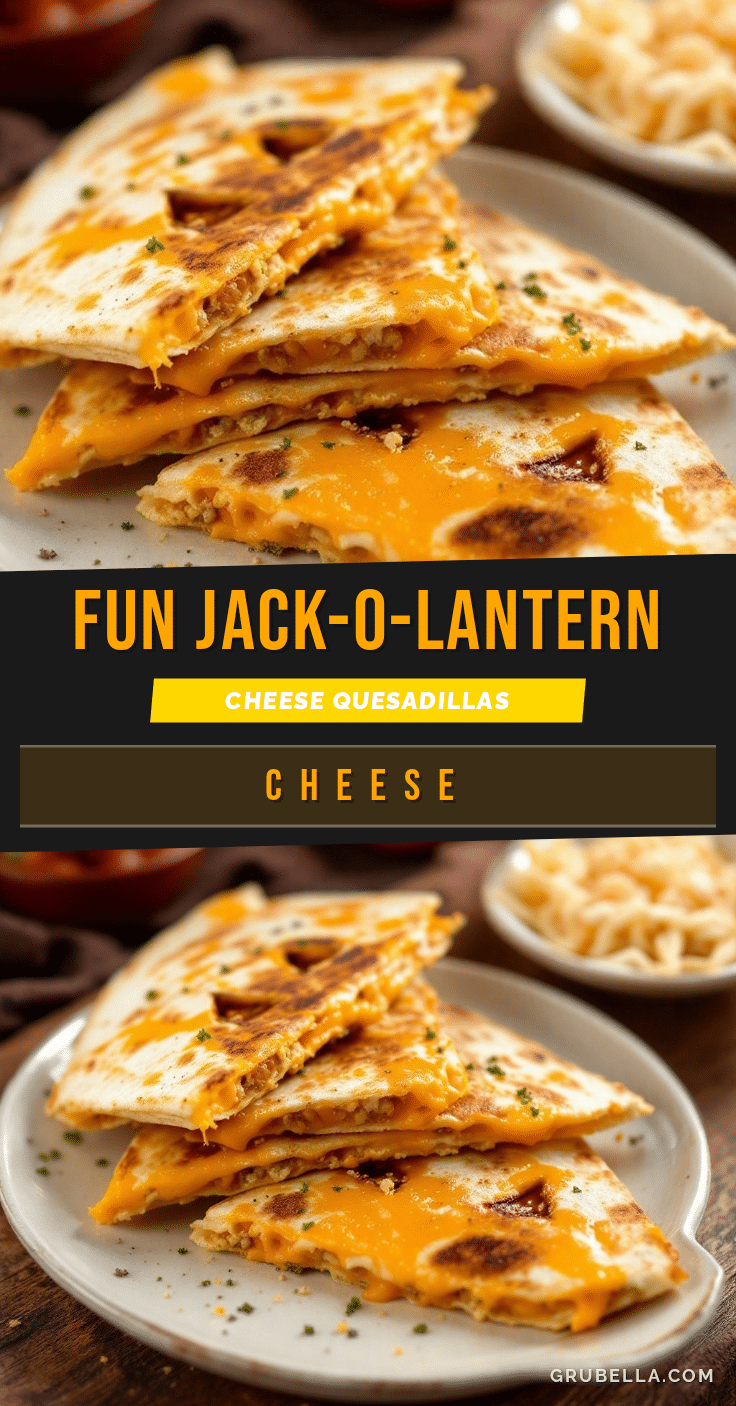
Fun Jack-O-Lantern Cheese Quesadillas: 3 Easy Halloween Snacks
These festive Jack-O-Lantern Cheese Quesadillas are a quick, easy, and fun Halloween snack that kids and adults love. Made with simple pantry staples like flour tortillas and shredded cheese, they are perfect for weeknight dinners or spooky parties.
- Prep Time: 7 minutes
- Cook Time: 8 minutes
- Total Time: 15 minutes
- Yield: 1 serving
- Category: Snack
- Cuisine: Mexican-American
Ingredients
- Medium flour tortillas (8-inch diameter)
- Shredded sharp cheddar cheese
- Shredded mozzarella cheese
- Butter or olive oil
- Cookie cutters (small shapes for eyes, nose, mouth)
- Optional: Finely chopped spinach or diced bell peppers
Instructions
- Prepare workspace: Gather ingredients and equipment. If tortillas are cold, microwave them wrapped in a damp paper towel for 15-20 seconds to make them pliable.
- Assemble the quesadilla: Lay a tortilla flat and sprinkle a generous layer of cheese over the surface, leaving a small border around the edge. Add optional veggies if desired.
- Create the Jack-O-Lantern face: Press cookie cutters into the top layer of cheese to mark spots for eyes and mouth, then carefully lift the cheese out from those spots to create holes. Alternatively, cut shapes into the tortilla and place cheese around them.
- Heat the skillet: Place a non-stick skillet over medium heat. Add a light layer of butter or olive oil and swirl to coat the bottom evenly.
- Cook the first side: Place the assembled quesadilla in the skillet. Cook for 3-4 minutes until the bottom is golden brown and crispy.
- Flip and cook the second side: Flip the quesadilla carefully using a spatula. Cook for another 2-3 minutes until the cheese is melted and the other side is golden brown.
- Rest and slice: Remove from skillet and let rest for 1 minute. Slice into wedges using a pizza cutter or sharp knife.
Notes
Use medium heat to prevent burning the tortilla before the cheese melts. If using pre-shredded cheese, toss with a teaspoon of cornstarch to improve melting. For gluten-free options, use gluten-free tortillas. For dairy-free, use dairy-free cheese shreds. Rest the quesadilla for 1 minute before slicing to prevent cheese from sliding out.
Nutrition
- Serving Size: 1 quesadilla
- Calories: 350
- Sugar: 2
- Sodium: 450
- Fat: 18
- Saturated Fat: 9
- Carbohydrates: 30
- Fiber: 2
- Protein: 12
Keywords: Halloween recipes, Jack-O-Lantern quesadillas, kid-friendly snacks, quick dinner ideas, cheese quesadillas, festive snacks, easy Halloween treats



