Love this? Save it for later!
Share the inspiration with your friends
By the fourth time I arranged the red pepperoni slices into a perfect circle, my kitchen looked like a deli exploded inside a toy factory. Honestly, I wasn’t even hungry anymore. I just needed the triangles to sit right. The first three attempts were disasters—either the “hat” slid off the “head” of cheese, or the red pepperoni looked more like a crime scene than a festive decoration. You know that feeling when you’re so focused on the aesthetic that you forget why you’re actually doing this? That was me. I had a dinner party coming up in two days, and I wanted something that screamed holiday spirit without requiring a culinary degree. I kept coming back to this idea because, let’s face it, traditional charcuterie boards are boring. They’re just a pile of meat and cheese. But a Santa hat? That’s a conversation starter. That’s the kind of thing that makes people put down their wine glasses and take a photo before they even eat. It’s not just food; it’s a little edible prop that says, “I tried, and I actually succeeded.”
What started as a panic-driven last-minute decoration project turned into my new holiday tradition. I realized that the effort required to make those little hats is negligible compared to the joy it brings. It’s visual candy. And once you see how easy it is to transform simple ingredients into festive shapes, you’ll never look at a board the same way again. It’s not about perfection; it’s about playfulness. And honestly, that’s the best part of the holidays.
Why You’ll Love This Recipe
This isn’t just another fancy platter you’ll stare at for an hour. This is practical festive food that works because it uses ingredients you already trust. I’ve tested dozens of cheese and meat combinations, and this specific Santa Hat style strikes the perfect balance between savory, salty, and sweet. It’s designed for people who want to look like they spent hours in the kitchen but actually only spent twenty minutes assembling.
- Quick & Easy: You can assemble the entire board in under 30 minutes. It’s perfect for busy weeknights or last-minute holiday gatherings when you’re juggling decorations and guest lists.
- Simple Ingredients: No fancy grocery trips needed. You likely already have the cheddar, pepperoni, and crackers in your pantry. It’s pantry-friendly elegance.
- Perfect for Holiday Parties: Great for office potlucks, family dinners, or cozy nights in. It fits any occasion where you want to add a splash of color.
- Crowd-Pleaser: Always gets rave reviews from kids and adults alike. The novelty factor alone makes it a hit, but the flavor keeps them coming back.
- Unbelievably Delicious: The texture and flavor combo is next-level comfort food. The sharp cheddar pairs perfectly with the salty pepperoni, creating a bite-sized flavor bomb.
What makes this recipe different from the rest is the structural integrity of the design. Many tutorials suggest using cream cheese as “glue,” but that gets messy and bland. By using a sturdy block of cheddar and high-quality cured meat, the hats stay put and taste incredible. This isn’t just another version—it’s your best version. It’s the kind of board that makes you close your eyes after the first bite because it’s just so satisfying. It’s comfort food reimagined—festive, fun, but with the same soul-soothing satisfaction as a warm meal. It’s perfect for impressing guests without stress, or turning a simple snack into something memorable.
What Ingredients You Will Need
This recipe uses simple, wholesome ingredients to deliver bold flavor and satisfying texture without the fuss. The magic lies in the contrast between the sharp cheese and the savory meat. You don’t need exotic spices or hard-to-find items. In fact, the simpler the ingredients, the better the final result looks. I like to keep the palette strictly red, white, and green to maintain that classic Christmas vibe, but feel free to mix it up.
For the Santa Hats
- Sharp Cheddar Cheese: Block form, cut into thick slices. I recommend Wyoming Cheddar for its sharp bite that stands up to the meat. (adds richness)
- Pepperoni Slices: Standard round slices, not the mini kind. You need enough to cover the top of the cheese block. (adds spice)
- Small Green Olives: Pitted and whole. These act as the pom-pom on top of the hat. (adds brine)
For the Base & Accents

- Salami or Prosciutto: Folded into rosettes. Salami is easier to fold and holds shape better. (adds savory depth)
- Almonds or Pecans: Whole nuts for crunch. (adds texture)
- Dried Cranberries: For a pop of red and tartness. (adds sweetness)
- Crackers: Square water crackers or baguette slices. (adds crunch)
- Red Grapes: Clusters for volume and color. (adds freshness)
- Green Olives: More of these for scattered accents. (adds brine)
For the cheese, look for a firm, small-curd cheddar for best texture. If you can’t find a good sharp cheddar, a mild cheddar works, but it might be a bit too soft for the hat shape. In summer, swap in fresh berries instead of dried cranberries for a brighter look. You can also use almond flour for a gluten-free option if you swap the crackers for gluten-free alternatives. The key is to have a variety of textures—soft cheese, chewy meat, crunchy nuts, and juicy fruit.
Equipment Needed
You don’t need much, which is the best part. The only real tool you need is a sharp chef’s knife. A dull knife will crush the cheese and make the hat look messy. I recommend using a high-carbon steel knife for clean cuts. A cheese plane is optional but helpful for getting uniform slices of cheddar. If you don’t have one, just be careful with the knife. A large wooden board or a marble slab is essential. Wood adds warmth, while marble keeps the cheese cool. I use a large slate board for holiday parties because it contrasts well with the red and white colors. If you’re on a budget, a clean, flat baking sheet lined with parchment paper works in a pinch. Just make sure it’s large enough to hold all the elements without crowding.
Preparation Method
Let’s get into the fun part. Arranging the board is like playing with food, but with rules. Here is how to build your Santa Hat Charcuterie Board step by step.
- Prepare the Cheese Blocks (5 minutes): Take your block of sharp cheddar and cut it into thick, rectangular slices. Aim for about 1/2 inch thick. You want these to be sturdy enough to hold the pepperoni without bending. If the cheese is too soft, it might slide. Place these slices on your board in a slight fan pattern. This will be the “head” of the Santa hat. (Tip: Let the cheese come to room temperature for 15 minutes before cutting for easier slicing.)
- Build the Hat (10 minutes): Take a slice of pepperoni and drape it over the top of one cheese block. You want it to hang down slightly on the sides, like the brim of a hat. If the pepperoni is too stiff, microwave it for 5 seconds to make it pliable. Repeat this for 3-4 cheese blocks, spacing them out across the board. You don’t need to cover every cheese block—just enough to create a focal point. (Troubleshooting: If the pepperoni keeps sliding off, place a small dot of cream cheese on the cheese block first to act as glue.)
- Add the Pom-Pom (5 minutes): Take a small green olive and place it on the very top of the pepperoni “brim.” This is the classic Santa hat pom-pom. Press it in gently so it stays. Do this for each hat you created. It’s the finishing touch that makes the illusion work. (Sensory cue: The olive should sit securely, not rolling off.)
- Fill the Board (10 minutes): Now, fill in the empty spaces. Fold your salami slices into rosettes and place them around the hats. Scatter almonds and pecans in the gaps. Toss in clusters of red grapes and dried cranberries. The goal is to make it look abundant and overflowing, but not chaotic. Use the olives to fill small holes. (Personal tip: I always leave one corner empty for a small bowl of dip or mustard.)
- Final Touches (5 minutes): Add your crackers or baguette slices along the edges. This creates a frame for the board. Check for color balance. If you see too much white, add more cranberries. If it looks too red, add more nuts or green olives. Step back and look at it. Does it look like Santa’s workshop? If yes, you’re done. (Warning: Don’t overfill the board. Leave space for people to grab items with their hands.)
Cooking Tips & Techniques
There are a few tricks I’ve learned the hard way to make this board look professional. First, temperature matters. Cheese tastes best at room temperature, so take it out of the fridge at least an hour before serving. Cold cheese is hard and flavorless. Second, variety in shape is key. Don’t just lay out flat crackers. Fold them, stack them, or break them. It adds visual interest. Third, don’t be afraid of negative space. A cluttered board is hard to navigate. Leave gaps between the items so guests can easily pick what they want. I once made a board so packed with food that people couldn’t reach the good stuff. Lesson learned. Also, if you’re using fresh fruit like grapes, wash and dry them thoroughly. Wet fruit makes the board soggy. And for the pepperoni hats, if you’re serving them hours in advance, cover them loosely with plastic wrap to prevent them from drying out. But honestly, they usually disappear in minutes, so you rarely need to worry about that.
Variations & Adaptations
This recipe is super flexible. If you’re hosting a mixed crowd, you can easily adapt it. For a vegetarian option, swap the pepperoni for roasted red pepper slices or sun-dried tomatoes. The shape will still hold, and the flavor will be tangy and delicious. For a gluten-free version, use rice crackers or gluten-free baguette slices. If you want a sweeter twist, use brie cheese instead of cheddar. The soft texture makes it a bit trickier to shape, but it pairs beautifully with honey and figs. I also love adding a few slices of prosciutto draped over the cheddar for a more luxurious feel. It’s a bit more expensive, but the salty-sweet combo is unbeatable. For a kid-friendly version, use mini pepperoni and cut the cheese into smaller cubes. They love the “hat” shape, and it’s a great way to get them to eat vegetables (if you add some cucumber slices as the “trim”).
Serving & Storage Suggestions
Serve this board at room temperature. It looks best when it’s been sitting out for about 20 minutes. Pair it with a crisp white wine or a spiced apple cider for a festive drink. I often serve it alongside a warm dip, like the creamy greek yogurt buffalo chicken dip for a savory kick, or a simple honey mustard. Leftovers can be stored in the refrigerator. Keep the cheese and meat in separate airtight containers to prevent them from absorbing odors. The crackers should be kept in a sealed bag to maintain crunch. Reheat the cheese? No, don’t do it. Cold cheese is fine, just not ideal. The flavors are best fresh. Over time, the olives might lose their brine, and the crackers might stale, so try to eat it all within 24 hours if possible. The colors will stay vibrant, but the textures will change.
Nutritional Information & Benefits
While this board is indulgent, it offers some nutritional balance. The cheddar provides calcium and protein, while the nuts offer healthy fats and fiber. The dried cranberries add antioxidants, and the olives provide monounsaturated fats. It’s a great way to snack without feeling heavy. Just be mindful of portion sizes, as the calorie density can add up quickly. It’s not a low-carb meal, but it’s a balanced appetizer. For those with dietary restrictions, most ingredients are naturally gluten-free (check your crackers) and dairy-free options are available if you swap the cheese for a vegan alternative, though the “hat” shape might be harder to achieve with soft vegan cheeses.
Conclusion
Making a Santa Hat Charcuterie Board is less about the food and more about the joy of creating something festive. It’s a simple way to bring holiday cheer to your table without the stress. I love this recipe because it’s playful, delicious, and surprisingly easy. It’s the kind of project that makes you feel like a holiday hero. I encourage you to try it and customize it with your favorite flavors. Don’t be afraid to experiment with different cheeses or meats. And if you make it, I’d love to hear how it went. Leave a comment below with your favorite combination or share a photo of your creation. Happy holidays, and happy snacking!
Frequently Asked Questions
Can I make the Santa Hat board ahead of time?
Yes, you can assemble it up to 2 hours in advance. Cover it loosely with plastic wrap and keep it in the fridge. Take it out 30 minutes before serving to let the cheese come to room temperature. This prevents the board from sweating and keeps the flavors fresh.
What kind of cheese is best for the hat?
Sharp cheddar is the best choice because it’s firm and holds its shape well. You can also use gouda or manchego, but avoid soft cheeses like brie or goat cheese, as they won’t support the pepperoni hat structure.
How do I keep the pepperoni from sliding off?
If the pepperoni is sliding, try microwaving it for 5-10 seconds to make it pliable. You can also place a tiny dot of cream cheese or mustard on the cheese block before adding the pepperoni to act as an adhesive.
Can I use turkey pepperoni instead?
Absolutely. Turkey pepperoni is a lighter option and works just as well. It might be slightly less spicy, but the shape and color will still be festive. It’s a great option for guests who prefer milder flavors.
What drinks pair well with this board?
Spiced apple cider, red wine, or a festive cocktail like the perfect caramel apple cider margarita are great pairings. The sweetness of the cider balances the saltiness of the cheese and meat perfectly.
Pin This Recipe!
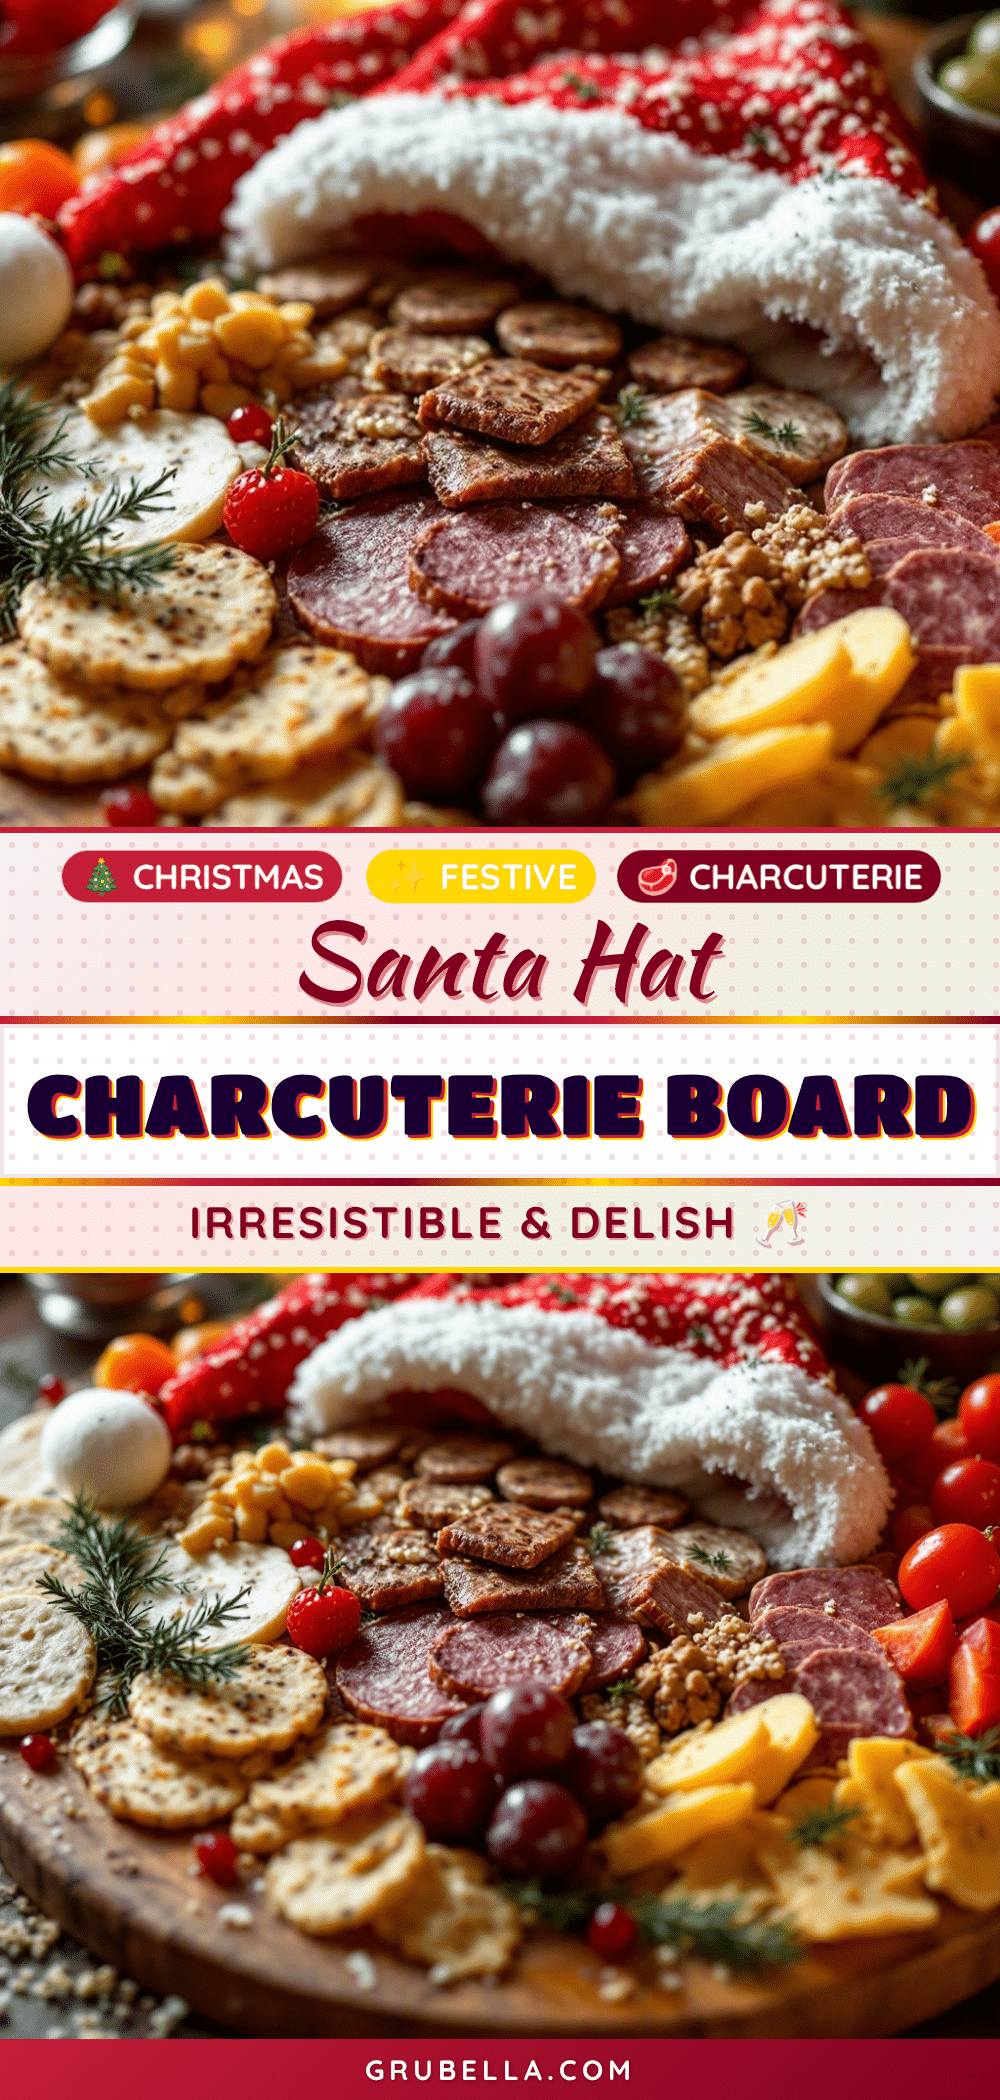
Perfect Christmas Charcuterie Board: 5 Easy Santa Hat Style Ideas
A festive and easy-to-assemble charcuterie board featuring sharp cheddar cheese blocks topped with pepperoni slices and green olives to resemble Santa hats, surrounded by nuts, fruits, and crackers.
- Prep Time: 30 minutes
- Cook Time: 0 minutes
- Total Time: 30 minutes
- Yield: 1 large board (serves 8-10)
- Category: Appetizer
- Cuisine: American
Ingredients
- Sharp Cheddar Cheese (block form, cut into 1/2 inch thick slices)
- Pepperoni Slices (standard round)
- Small Green Olives (pitted and whole)
- Salami or Prosciutto (folded into rosettes)
- Almonds or Pecans (whole)
- Dried Cranberries
- Crackers (square water crackers or baguette slices)
- Red Grapes (clusters)
- Green Olives (for accents)
Instructions
- Prepare the cheese blocks by cutting sharp cheddar into thick, rectangular slices (approx. 1/2 inch). Let cheese come to room temperature for 15 minutes before cutting for easier slicing. Arrange slices on the board in a slight fan pattern.
- Build the hat by draping a slice of pepperoni over the top of a cheese block so it hangs down slightly like a brim. If stiff, microwave for 5 seconds to make pliable. Repeat for 3-4 cheese blocks.
- Add the pom-pom by placing a small green olive on the very top of the pepperoni brim. Press gently to secure. Repeat for each hat.
- Fill the board by folding salami into rosettes and placing them around the hats. Scatter almonds, pecans, red grapes, and dried cranberries in the gaps. Use olives to fill small holes.
- Add final touches by placing crackers or baguette slices along the edges to create a frame. Check for color balance and ensure there is space for guests to grab items.
Notes
Serve at room temperature for best flavor. If making ahead, assemble up to 2 hours in advance and cover loosely with plastic wrap. Keep cheese and meat separate in storage. For a vegetarian option, swap pepperoni for roasted red peppers. For gluten-free, use rice crackers.
Nutrition
- Serving Size: Varied bites from th
- Calories: 350
- Sugar: 8
- Sodium: 650
- Fat: 24
- Saturated Fat: 10
- Carbohydrates: 15
- Fiber: 2
- Protein: 18
Keywords: Christmas charcuterie, Santa hat snack, holiday party food, easy appetizer, cheese board, festive snacks, holiday entertaining



